

3.2.1. Sending Push Notifications
Setup Guide
Before you begin, make sure that you’ve completed the following steps:
By the end of this guide:Maestra will be able to send a push notification and it will be displayed on a device.
To check that your push notifications are being sent, please refer to the Maestra mobile push notification control guide.
A push notification is a message that pops up on a mobile device with a title, text body, and a URL the user is taken to when they click the notification.
Unlike rich push notifications, basic ones do not display buttons or pictures.
1. Enable push notifications in app settings
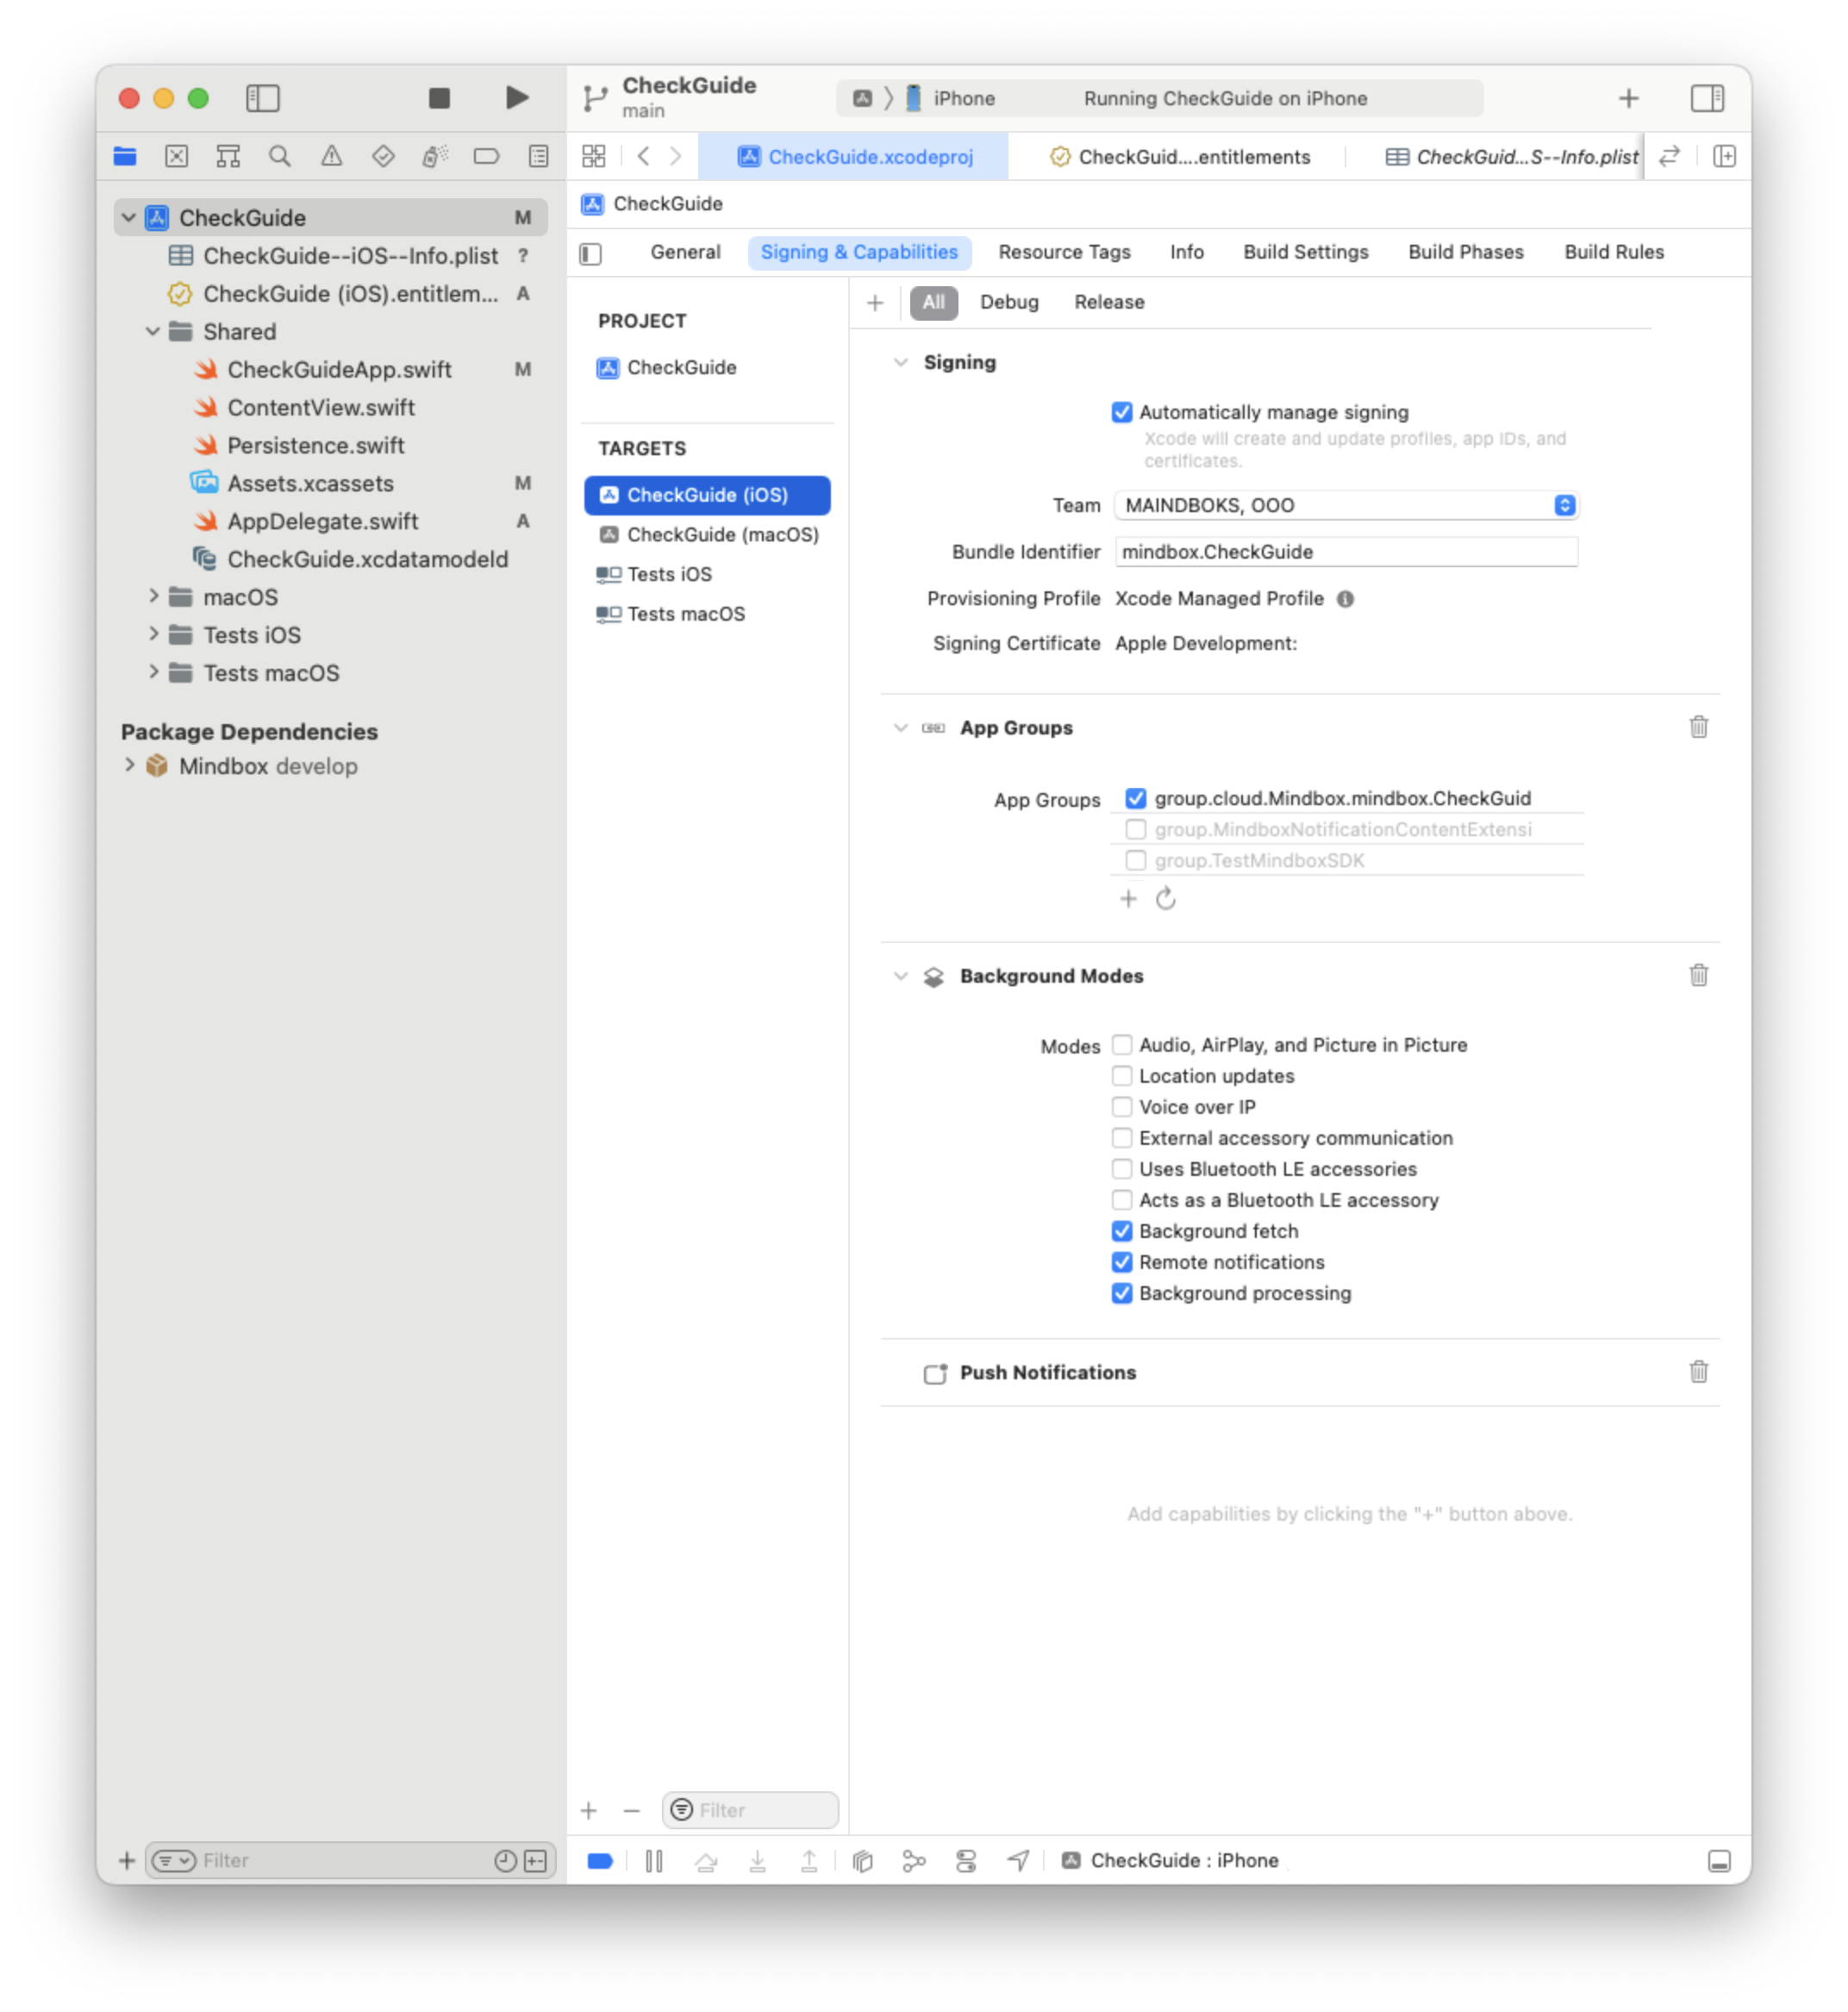
- Open the project settings.
- Tick what you will set up on the list of Targets.
- Go to the
Signing & Capabilitiestab. - Click Add and tick
Push NotificationsandBackground Modes. - On the
Background Modespane, tick:- Background fetch;
- Remote notifications, and
- Background processing.
Deliver the keys to your Maestra Forward Deployed Marketer to connect to Apple Push Notification service and add the keys yourself.
2. Request permission to display notifications
Open AppDelegate.swift to find and implement the registerForRemoteNotifications function. Call Mindbox.shared.notificationsRequestAuthorization from this function.
To call the function, use the didFinishLaunchingWithOptions method:
//
//  AppDelegate.swift
//  Sample
//
//  Created by Peter Nikitin on 06.04.2022.
//

import Foundation
import Mindbox
import UIKit

class AppDelegate: UIResponder, UIApplicationDelegate {

    ...

    func application(_ application: UIApplication, didFinishLaunchingWithOptions launchOptions: [UIApplication.LaunchOptionsKey: Any]?) -> Bool {
      // Call the notification registration method
      registerForRemoteNotifications()

        ...

    }

  //    MARK: registerForRemoteNotifications
  //    Function to request permission to display notifications. In the Completion block, send the permission status to Mindbox’s SDK
  func registerForRemoteNotifications() {
    UNUserNotificationCenter.current().delegate = self
    DispatchQueue.main.async {
      UIApplication.shared.registerForRemoteNotifications()
      UNUserNotificationCenter.current().requestAuthorization(options: [ .alert, .sound, .badge]) { granted, error in
        print("Permission granted: \(granted)")
        if let error = error {
          print("NotificationsRequestAuthorization failed with error: \(error.localizedDescription)")
        }
        Mindbox.shared.notificationsRequestAuthorization(granted: granted)
      }
    }
  }

    ...

}
3. Implement standard notification display
Open AppDelegate.swift to find and implement the userNotificationCenter.willPresent function for received notifications to be displayed on a screen.
//
//  AppDelegate.swift
//  Sample
//
//  Created by Peter Nikitin on 06.04.2022.
//

import Foundation
import Mindbox
import UIKit

class AppDelegate: UIResponder, UIApplicationDelegate {

    ...

    func userNotificationCenter(
    _ center: UNUserNotificationCenter,
    willPresent notification: UNNotification,
    withCompletionHandler completionHandler: @escaping (UNNotificationPresentationOptions) -> Void
  ) {
      completionHandler([.alert, .badge, .sound])
  }

    ...

}
Pass the APNs token to the SDK
Open AppDelegate.swift to find (or create) the didRegisterForRemoteNotificationsWithDeviceToken method. Call Mindbox.shared.apnsTokenUpdate(deviceToken: deviceToken) from this method.
//
//  AppDelegate.swift
//  Sample
//
//  Created by Peter Nikitin on 06.04.2022.
//

import Foundation
import Mindbox
import UIKit

class AppDelegate: UIResponder, UIApplicationDelegate {

                ...

   func application(
        _ application: UIApplication,
        didRegisterForRemoteNotificationsWithDeviceToken deviceToken: Data) {
        Mindbox.shared.apnsTokenUpdate(deviceToken: deviceToken)
  }

                ...

}
Check your results:You should now be able to send a push notification via Maestra that is displayed on a mobile device screen.
To check that your push notifications are being sent, please refer to Maestra Mobile Push Control Guide.
Updated 2 months ago