

Displaying an image preview
Expected result of the “Displaying an image preview” step:The push notification is displayed with a small square image on the right.
You can use this guide to verify that push notifications with images are being sent correctly.
1. Creating the Extension
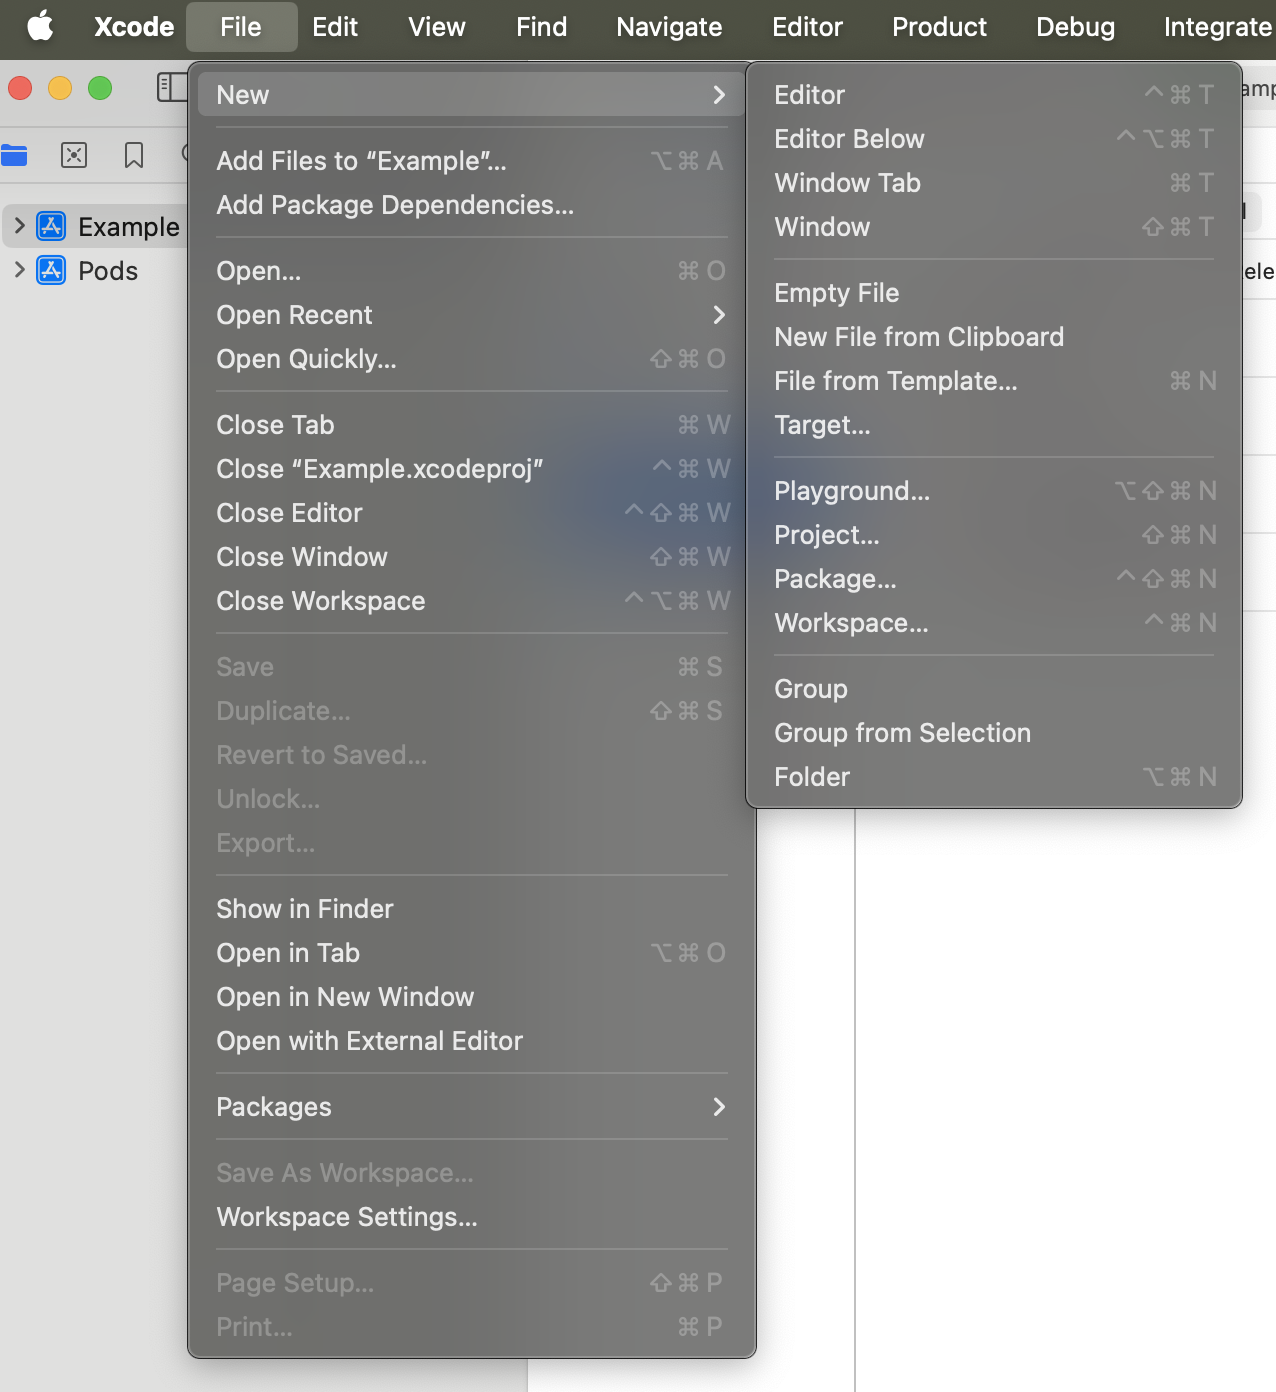
- In Xcode, select
File > New > Target. - Choose
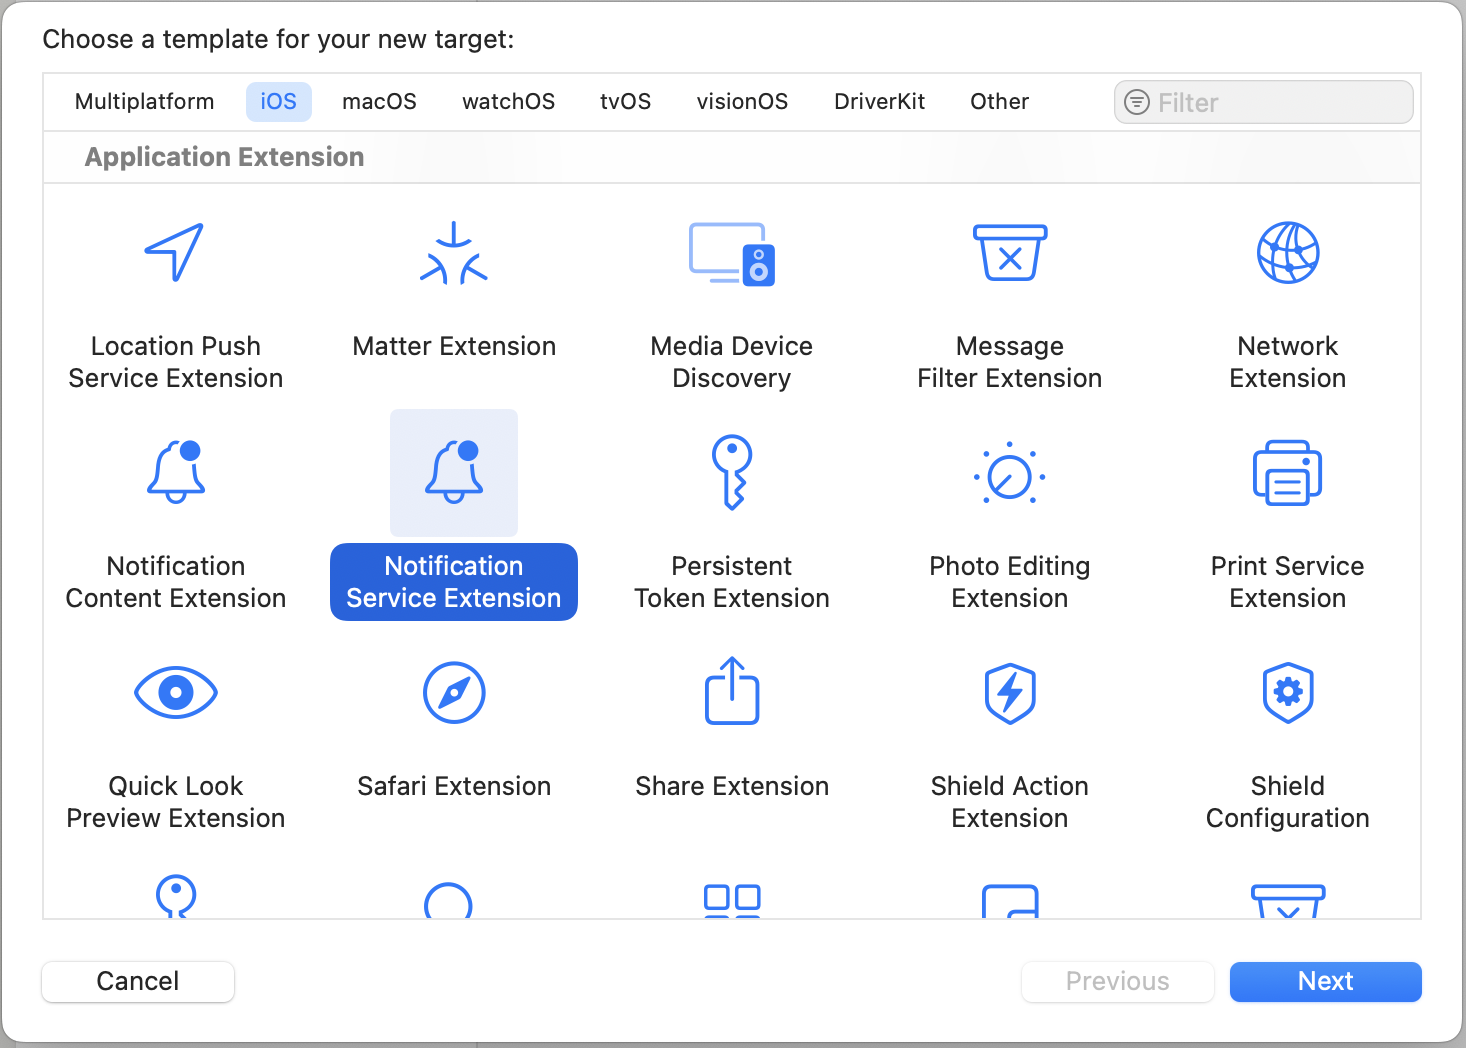
Notification Service Extensionand clickNext. - Enter MindboxNotificationServiceExtension as the
product name, then click Finish. - In the Activate scheme dialog, click
Activate.
2. Extension Setup
2.1 iOS Deployment Target
Make sure the iOS Deployment Target versions match for the following targets:
- Main target
- Service Extension
- Content Extension
You can find this setting here: Your Project Name → Targets → Target Name → General → Minimum Deployments → iOS
The iOS Deployment Target is critical for proper operation of the Service Extension and Content Extension.Make sure to double-check this setting, especially after upgrading to a new Xcode version.
iOS Deployment Target may update automatically after that, which can cause the Service Extension and Content Extension to stop working correctly.
2.2 App Groups
-
Open the project settings.
-
Select the
MindboxNotificationServiceExtensiontarget. -
Go to the
Signing & Capabilitiestab. -
Click + Capability and select
App Groups. -
Add a new group using the following format:
group.cloud.Mindbox.{app bundle ID}For example, if the app bundle ID is
Maestra-Sample-App, the App Group value should be:
group.cloud.Mindbox.Maestra-Sample-App
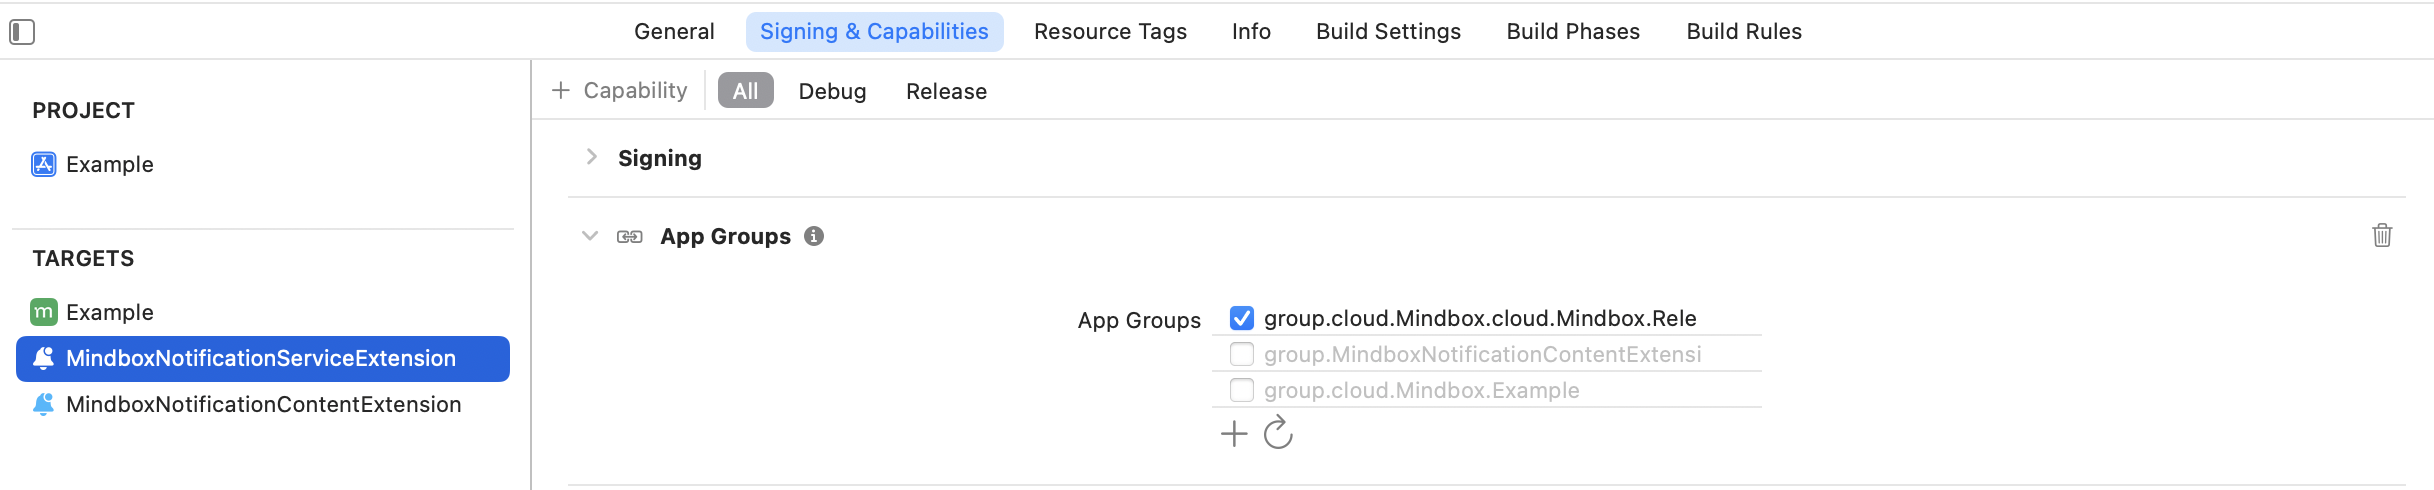
Configuring an App Group is mandatory for the Mindbox SDK.
Skipping this step may cause the extension to crash when handling push notifications, making the issue hard to debug.
2.3 Extension Signing
The extension must be signed with the same certificate as the main app. If you’re using automatic signing, Xcode will handle this for you. If you’re using manual signing, make sure to create the required certificates for the extension target and configure them in Signing & Capabilities.
2.4. Verifying Rich Push Notifications Using Xcode Debug Builds
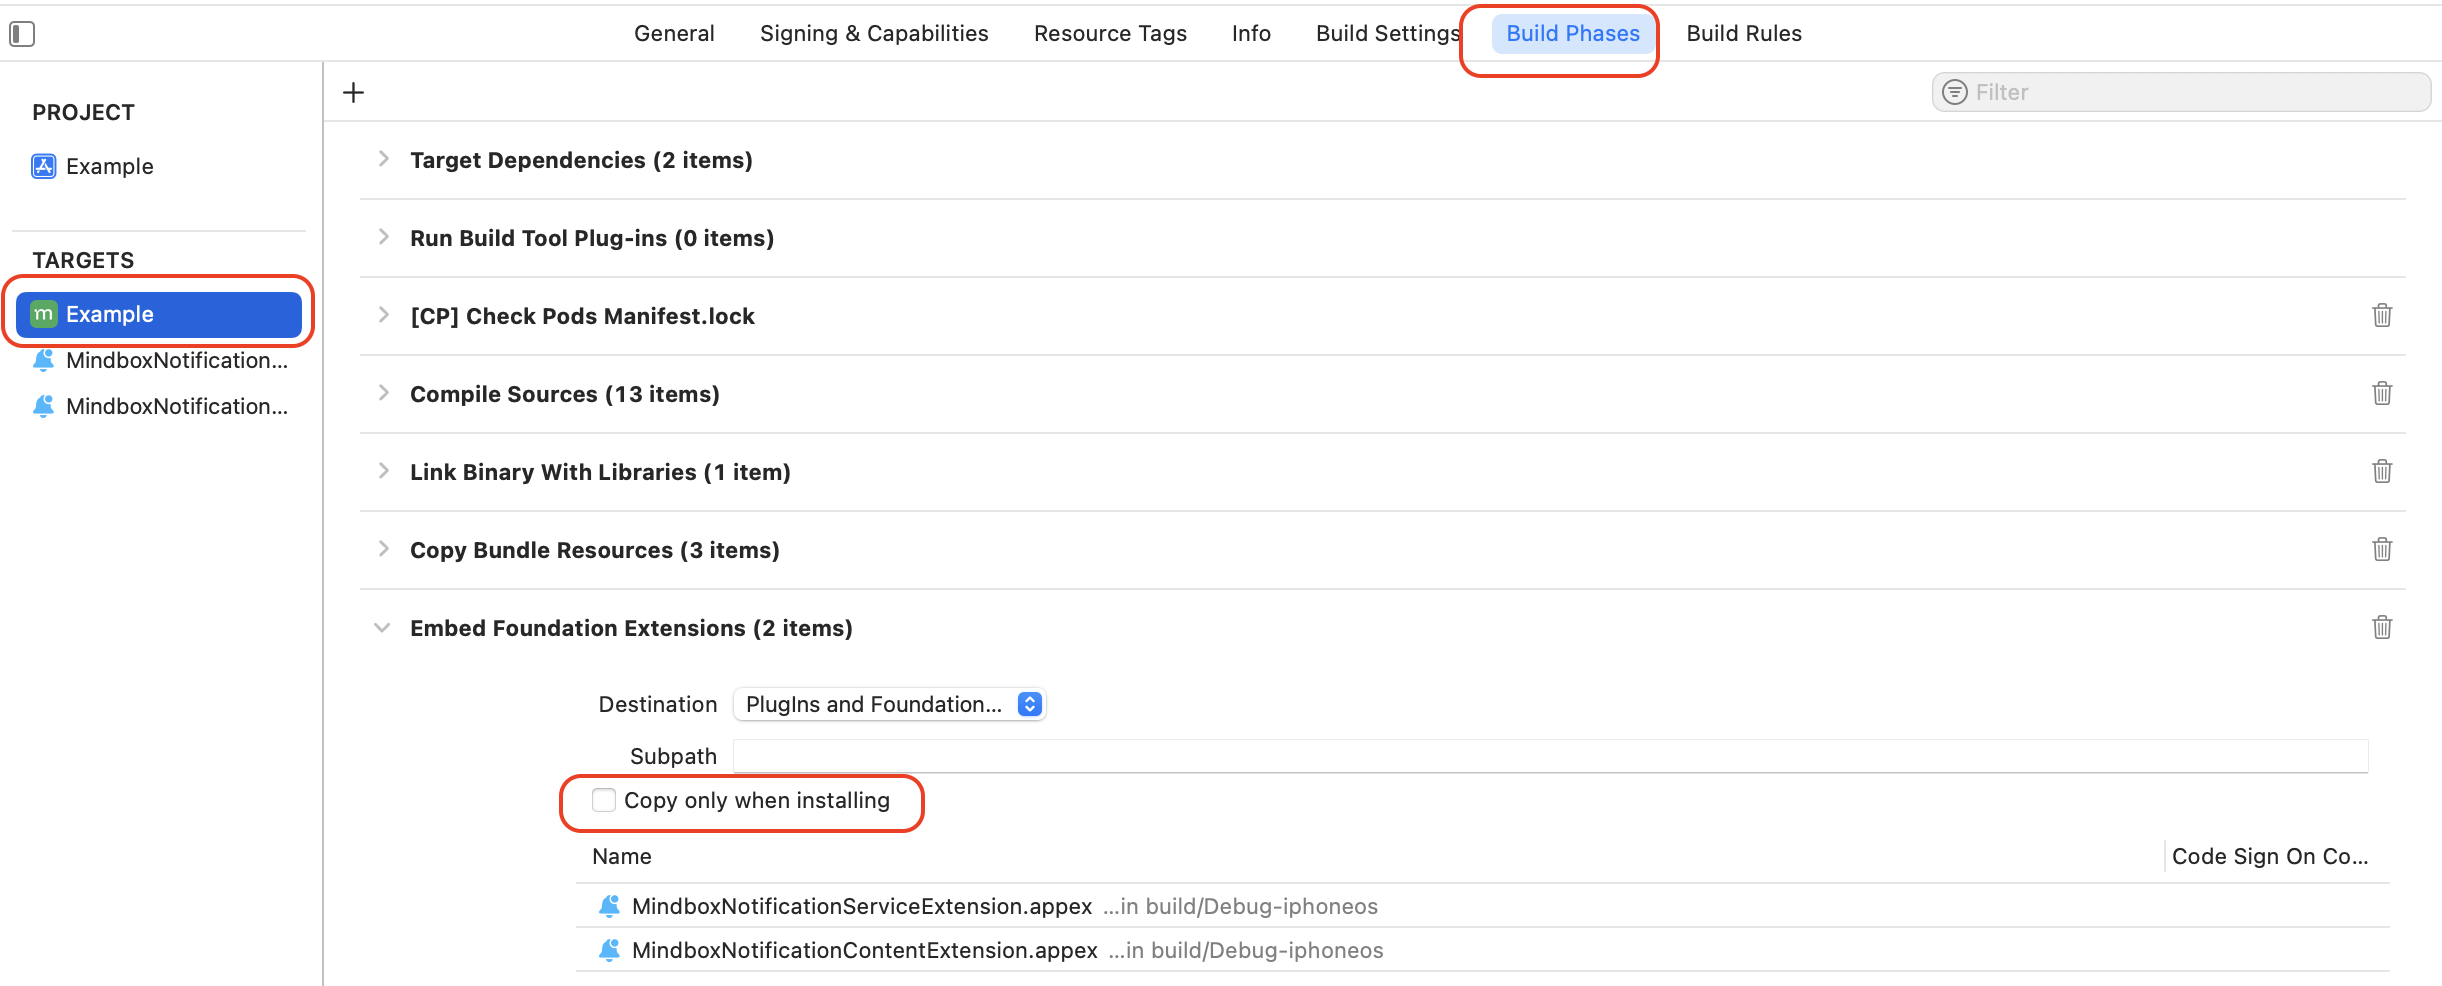
In Xcode, go to Target → Build Phases → Embed App Extensions and make sure the Copy only when installing checkbox is unchecked.
Uncheck this option ONLY if you plan to test Rich Push Notifications using debug builds created directly in Xcode.
3. Adding the SDK to the project
- In Xcode, click File → Add Packages in the top menu.
- In the dialog that opens, add the Mindbox SDK repository URL https://github.com/mindbox-cloud/ios-sdk and click Add Package.
- After the package is downloaded, assign the targets:
- Add
MindboxNotificationsServiceto the previously createdMindboxNotificationServiceExtension - Add
MindboxNotificationsContentto the previously createdMindboxNotificationContentExtension
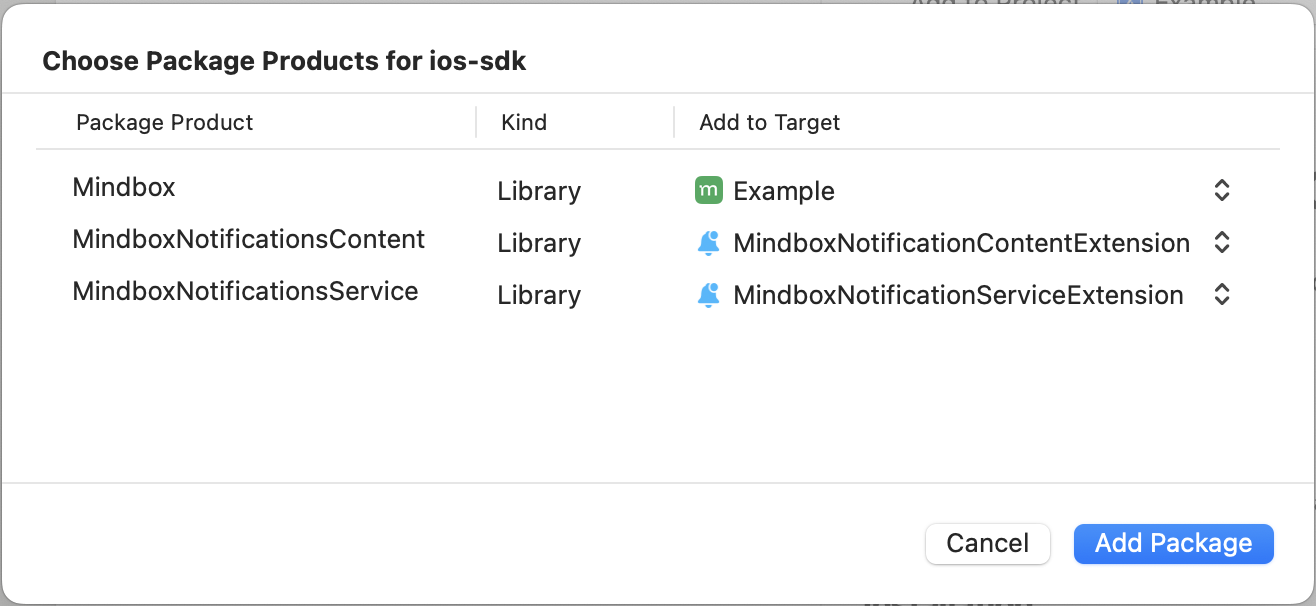
Add the following directive to your Podfile to include the SDK in the extension.
....
use_frameworks!
....

target '<your application>' do
  pod 'Mindbox'
end

# --- New ----
# Pods for MindboxNotificationServiceExtension
target 'MindboxNotificationServiceExtension' do
   pod 'MindboxNotifications'
end
# Pods for MindboxNotificationContentExtension
target 'MindboxNotificationContentExtension' do
   pod 'MindboxNotifications'
end
...
4. Configuring the SDK in the App
In the extension’s main file, configure the following:
- Import the MindboxNotifications library;
- Initialize MindboxNotificationService();
- Add calls to didReceive and serviceExtensionTimeWillExpire in two places.
import UserNotifications
import MindboxNotifications

class NotificationService: UNNotificationServiceExtension {

  lazy var mindboxService: MindboxNotificationServiceProtocol = MindboxNotificationService()

  override func didReceive(_ request: UNNotificationRequest,
                           withContentHandler contentHandler: @escaping (UNNotificationContent) -> Void) {
    mindboxService.didReceive(request, withContentHandler: contentHandler)
  }

  override func serviceExtensionTimeWillExpire() {
    mindboxService.serviceExtensionTimeWillExpire()
  }
}
Advanced extension implementation. Use this approach if:
- you use multiple push providers;
- you need custom notification-handling logic;
- you need to process data from the payload;
- you use a custom Notification Content Extension.
To implement it, you need to:
- Initialize MindboxNotificationService() to access public methods;
- Check the uniqueKey field in the push notification. If it’s not empty, the notification was sent by Maestra and you should call
mindboxService.pushDelivered(request). This method sends a delivery signal back to Maestra. If the notification isn’t from Maestra, it will be ignored; - Implement notification handling. You can do this in a few ways:
- Use the MindboxNotificationService() methods from the previous example;
- Implement everything yourself by parsing and handling all fields in the iOS push iOS Push Notification Format.
Basic Example Without Content Handling:
import UserNotifications
import MindboxNotifications

class NotificationService: UNNotificationServiceExtension {

  lazy var mindboxService: MindboxNotificationServiceProtocol = MindboxNotificationService()

  var contentHandler: ((UNNotificationContent) -> Void)?
  var bestAttemptContent: UNMutableNotificationContent?

  override func didReceive(_ request: UNNotificationRequest, withContentHandler contentHandler: @escaping (UNNotificationContent) -> Void) {

    if mindboxService.isMindboxPush(userInfo: request.content.userInfo) {
      mindboxService.pushDelivered(request)
    }

    self.contentHandler = contentHandler
    self.bestAttemptContent = (request.content.mutableCopy() as? UNMutableNotificationContent)

    guard let bestAttemptContent = self.bestAttemptContent else { return }
    contentHandler(bestAttemptContent)
  }


  override func serviceExtensionTimeWillExpire() {
    if let contentHandler = contentHandler, let bestAttemptContent =  bestAttemptContent {
      contentHandler(bestAttemptContent)
    }

  }
}
Verify the result of the “Displaying an image preview” step:The push notification is displayed with a small square image on the right.
Make sure the push notification with an image is sent correctly.
Updated 8 months ago