

Testing your mobile push notification setup
If something isn't working as expected, check the SDK integration checklist for a full list of common issues and fixes.
How to run a test
Follow these steps for every test scenario. Depending on what you're testing, add the relevant configuration in step 5 before sending.
-
Launch the app on a physical device — emulators can't receive push notifications.
-
Copy your
deviceUUIDfrom the console. -
Find your customer by
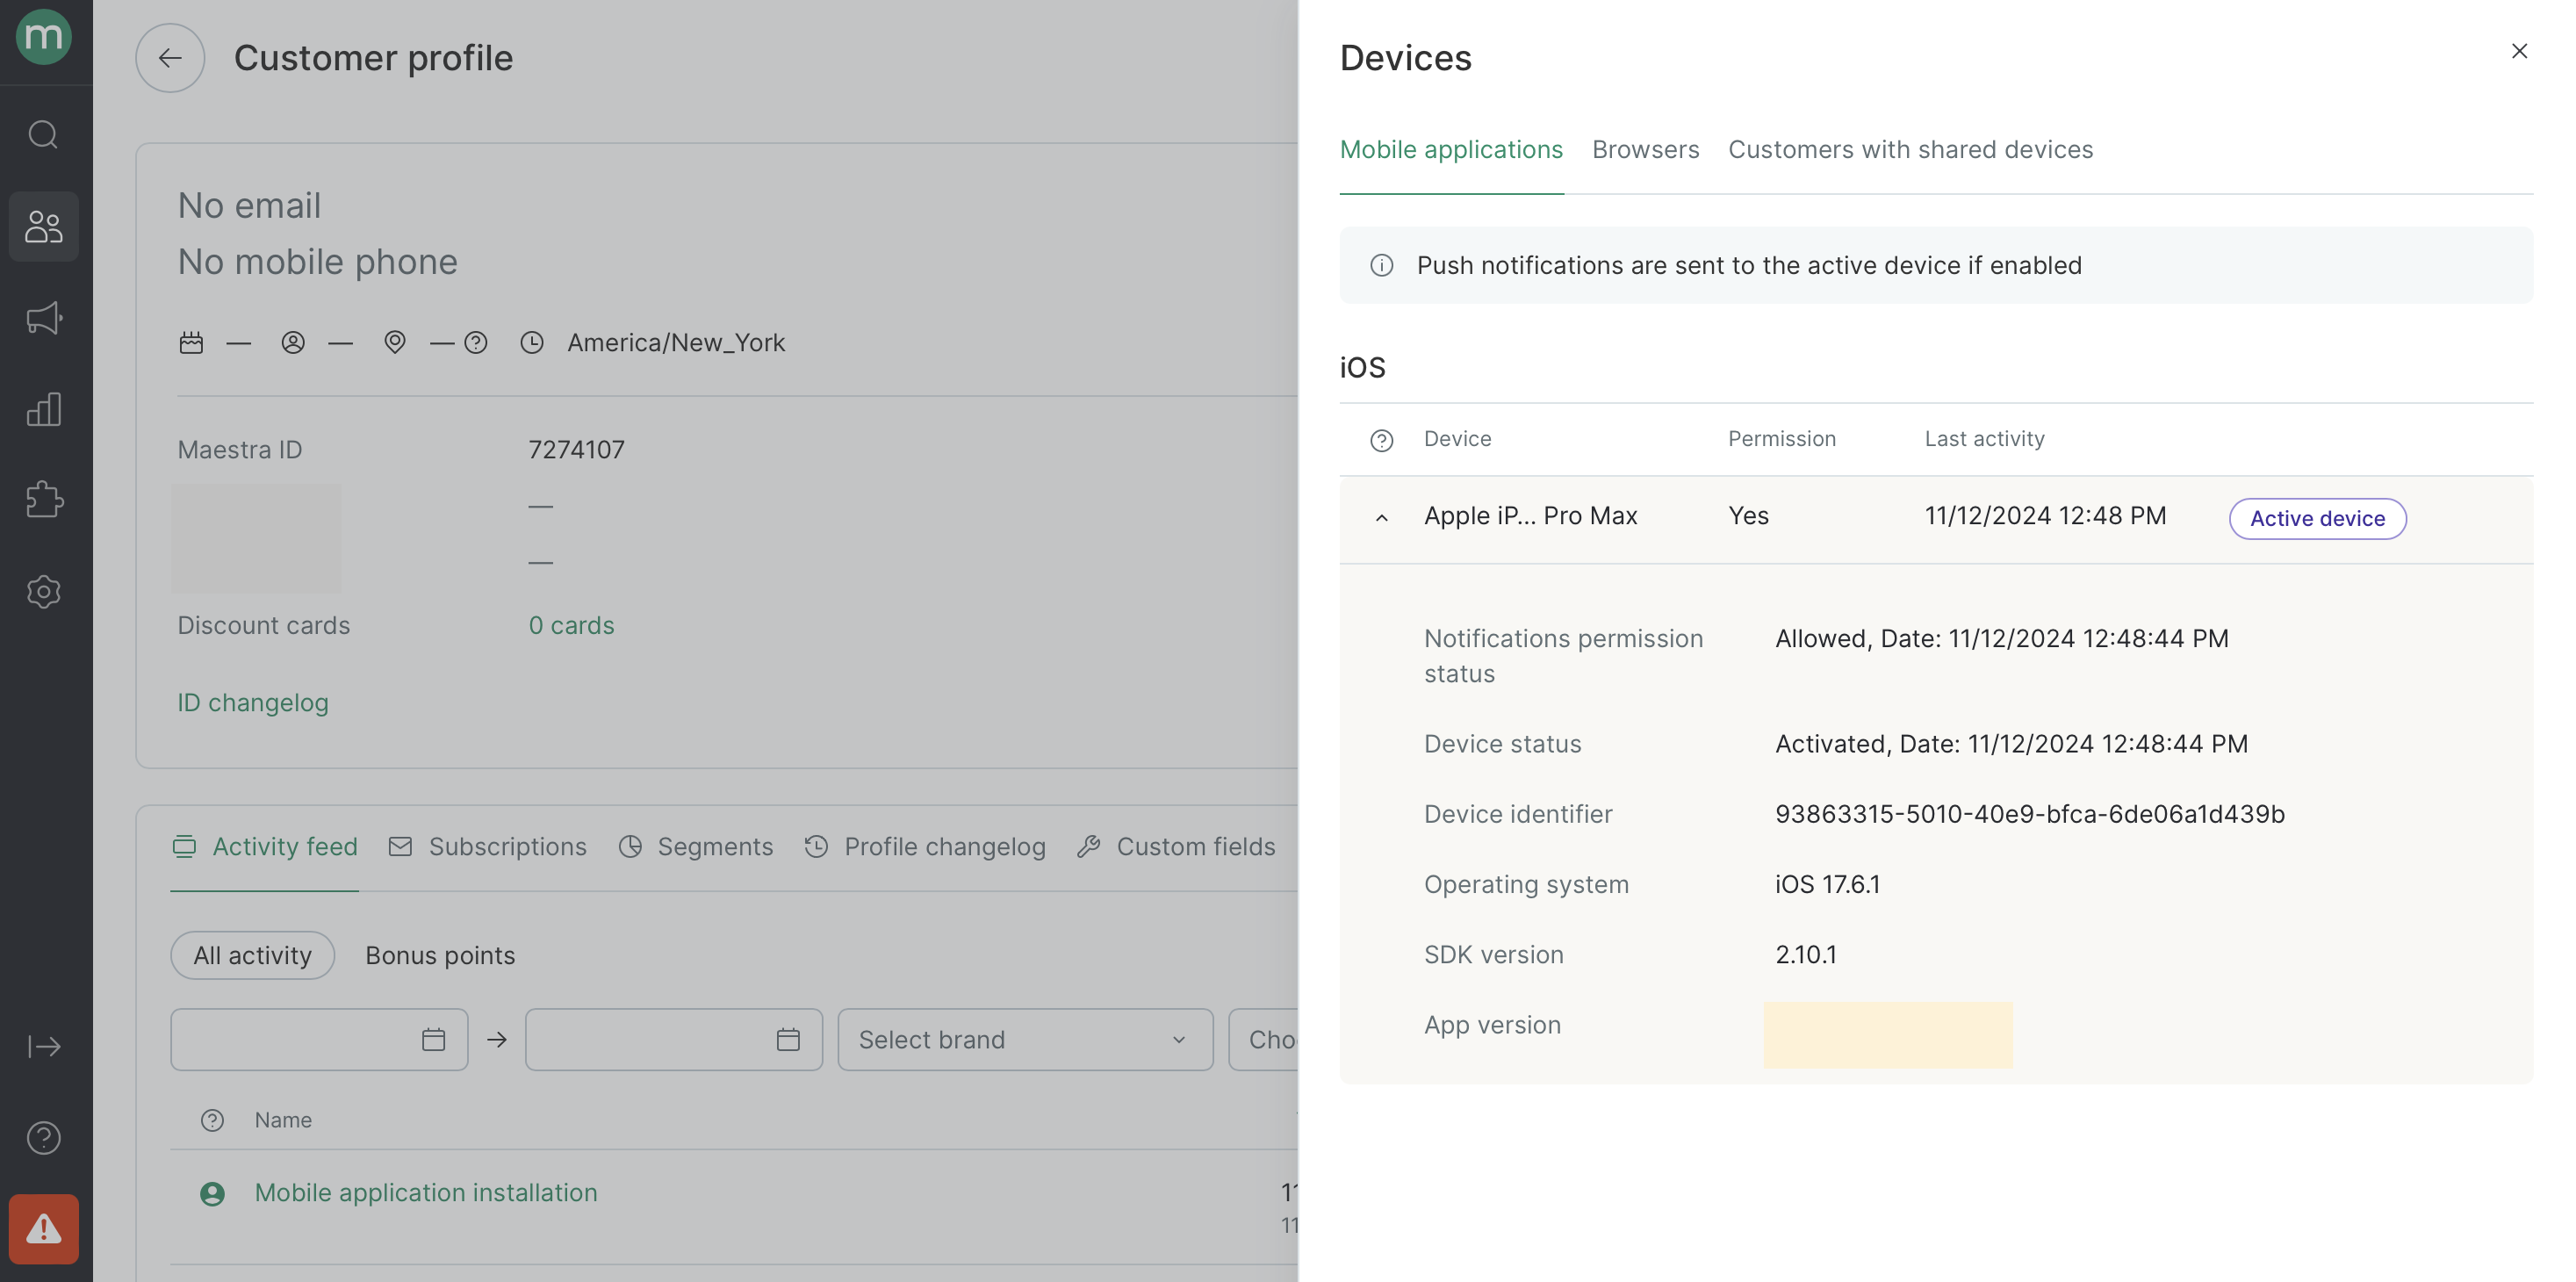
deviceUUIDin Maestra and verify the following on their profile page:-
Notifications permission status: Allowed
Maestra checks whether the user has allowed the app to display notifications. Checked automatically by the SDK on every app launch. On iOS — requires an explicit system prompt. On Android — granted by default based on store settings. -
Device status: Activated
Maestra checks whether the device has a valid push token. The token is obtained via the mobile SDK and stays active until APNs or Firebase signals it's no longer valid — which typically means the user uninstalled the app.
-
-
Create a mobile push campaign and fill in the title and body text.
If you are testing mobile push notifications on iOS-based app in the Sandbox environment, remember to tick the "Sandbox Message" box in the campaign profile.
Details on the Sandbox environment -
Add the relevant configuration for your test scenario — see the options below.
Feel free to test just one option or go ahead and try them all at once. -
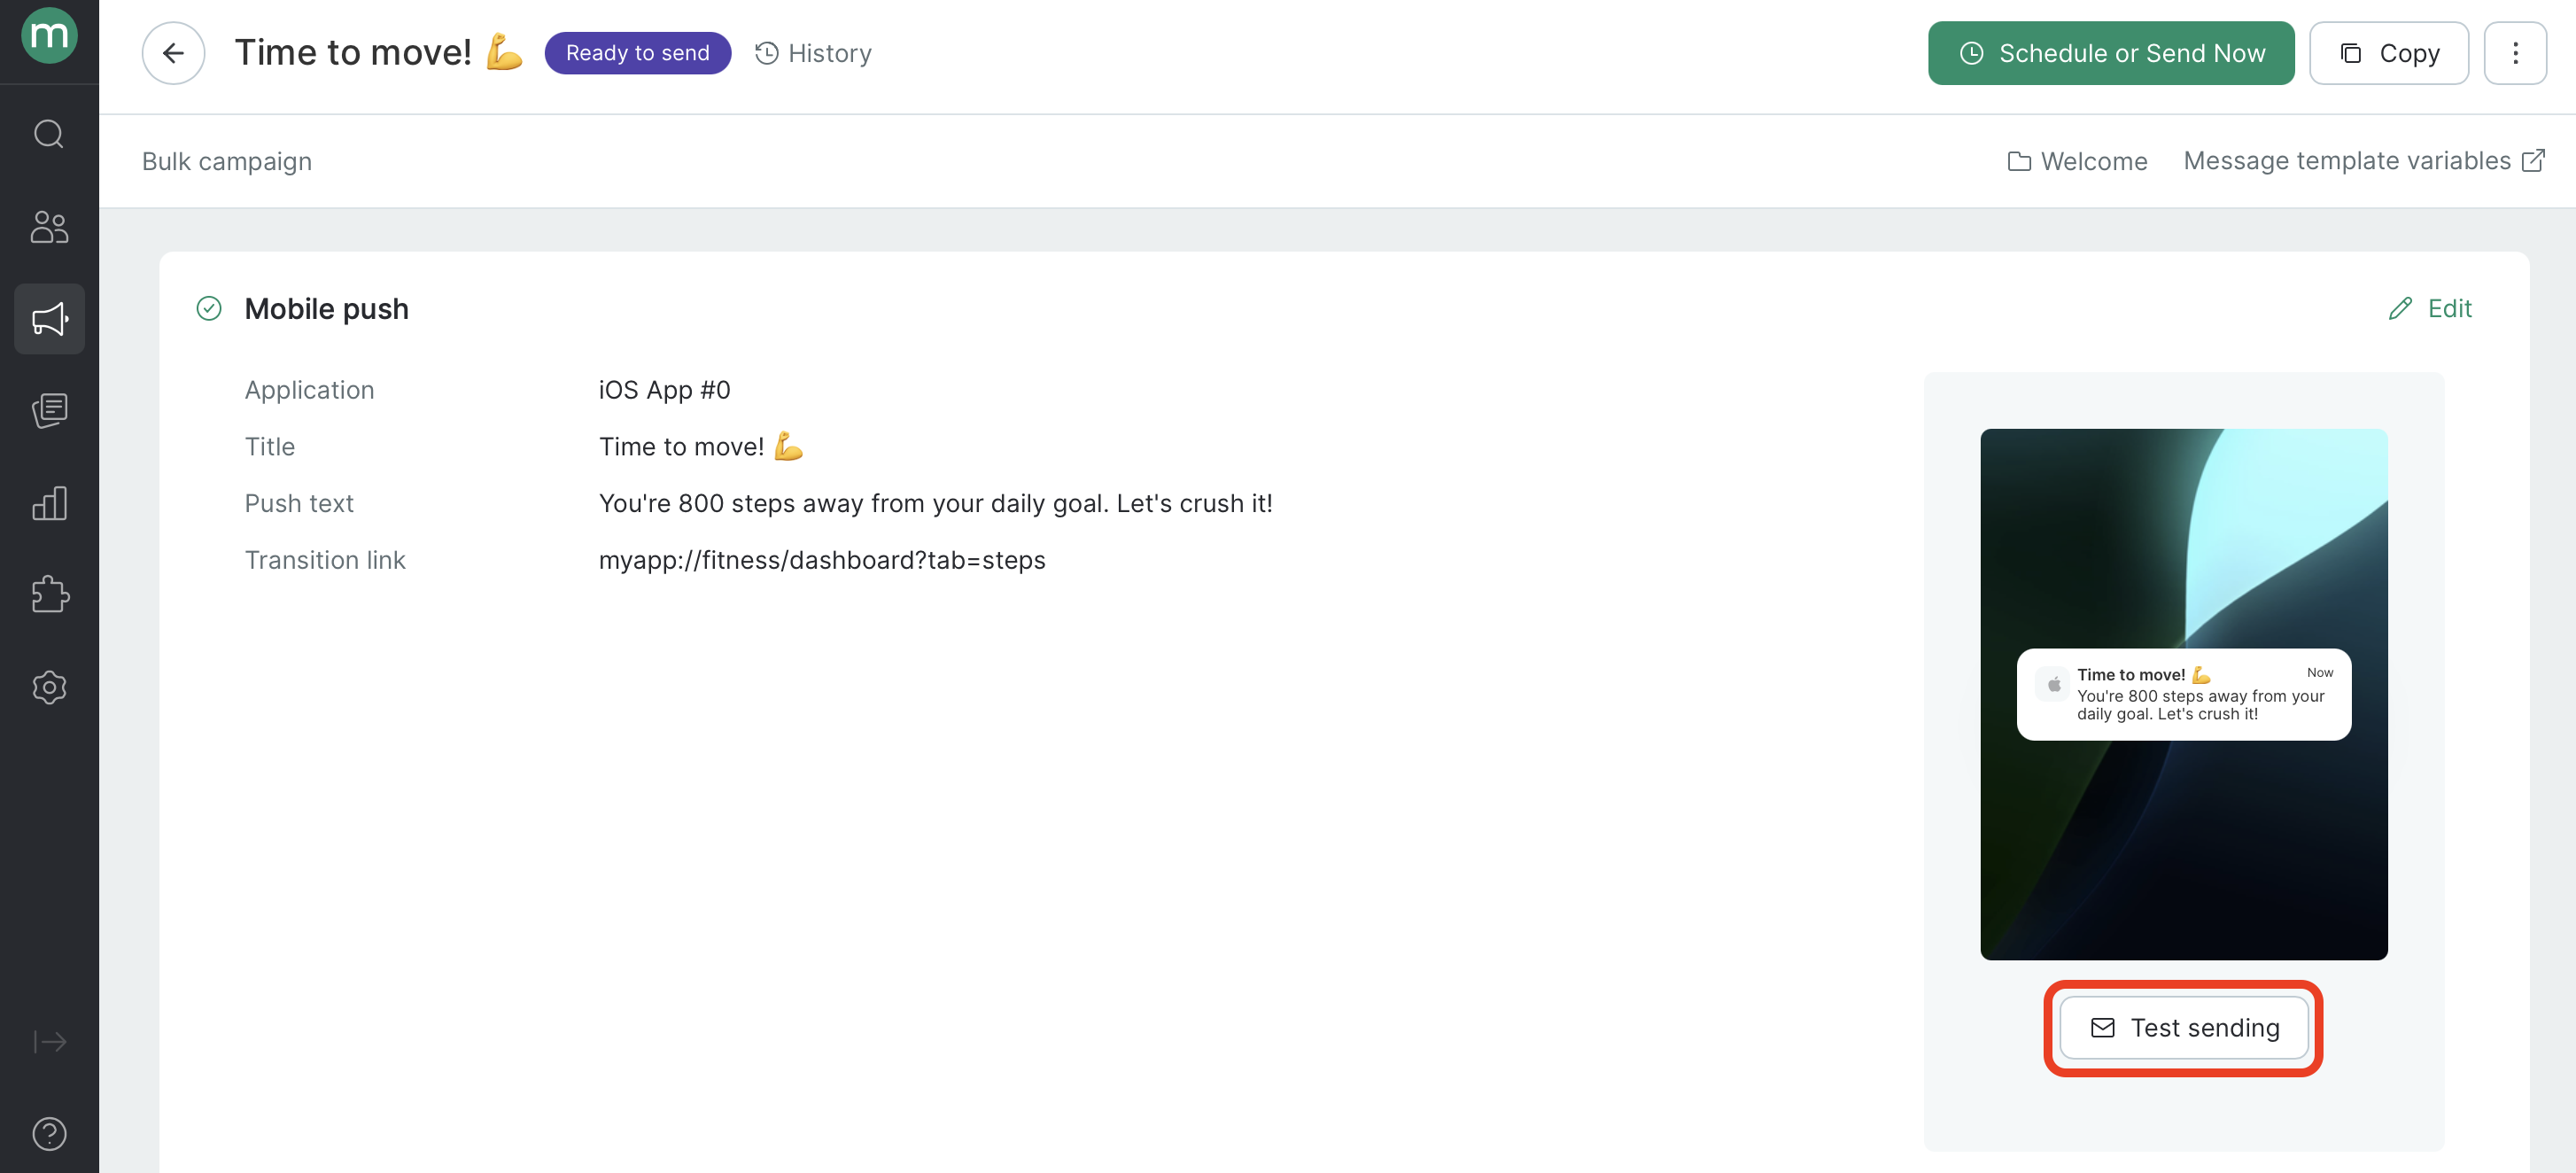
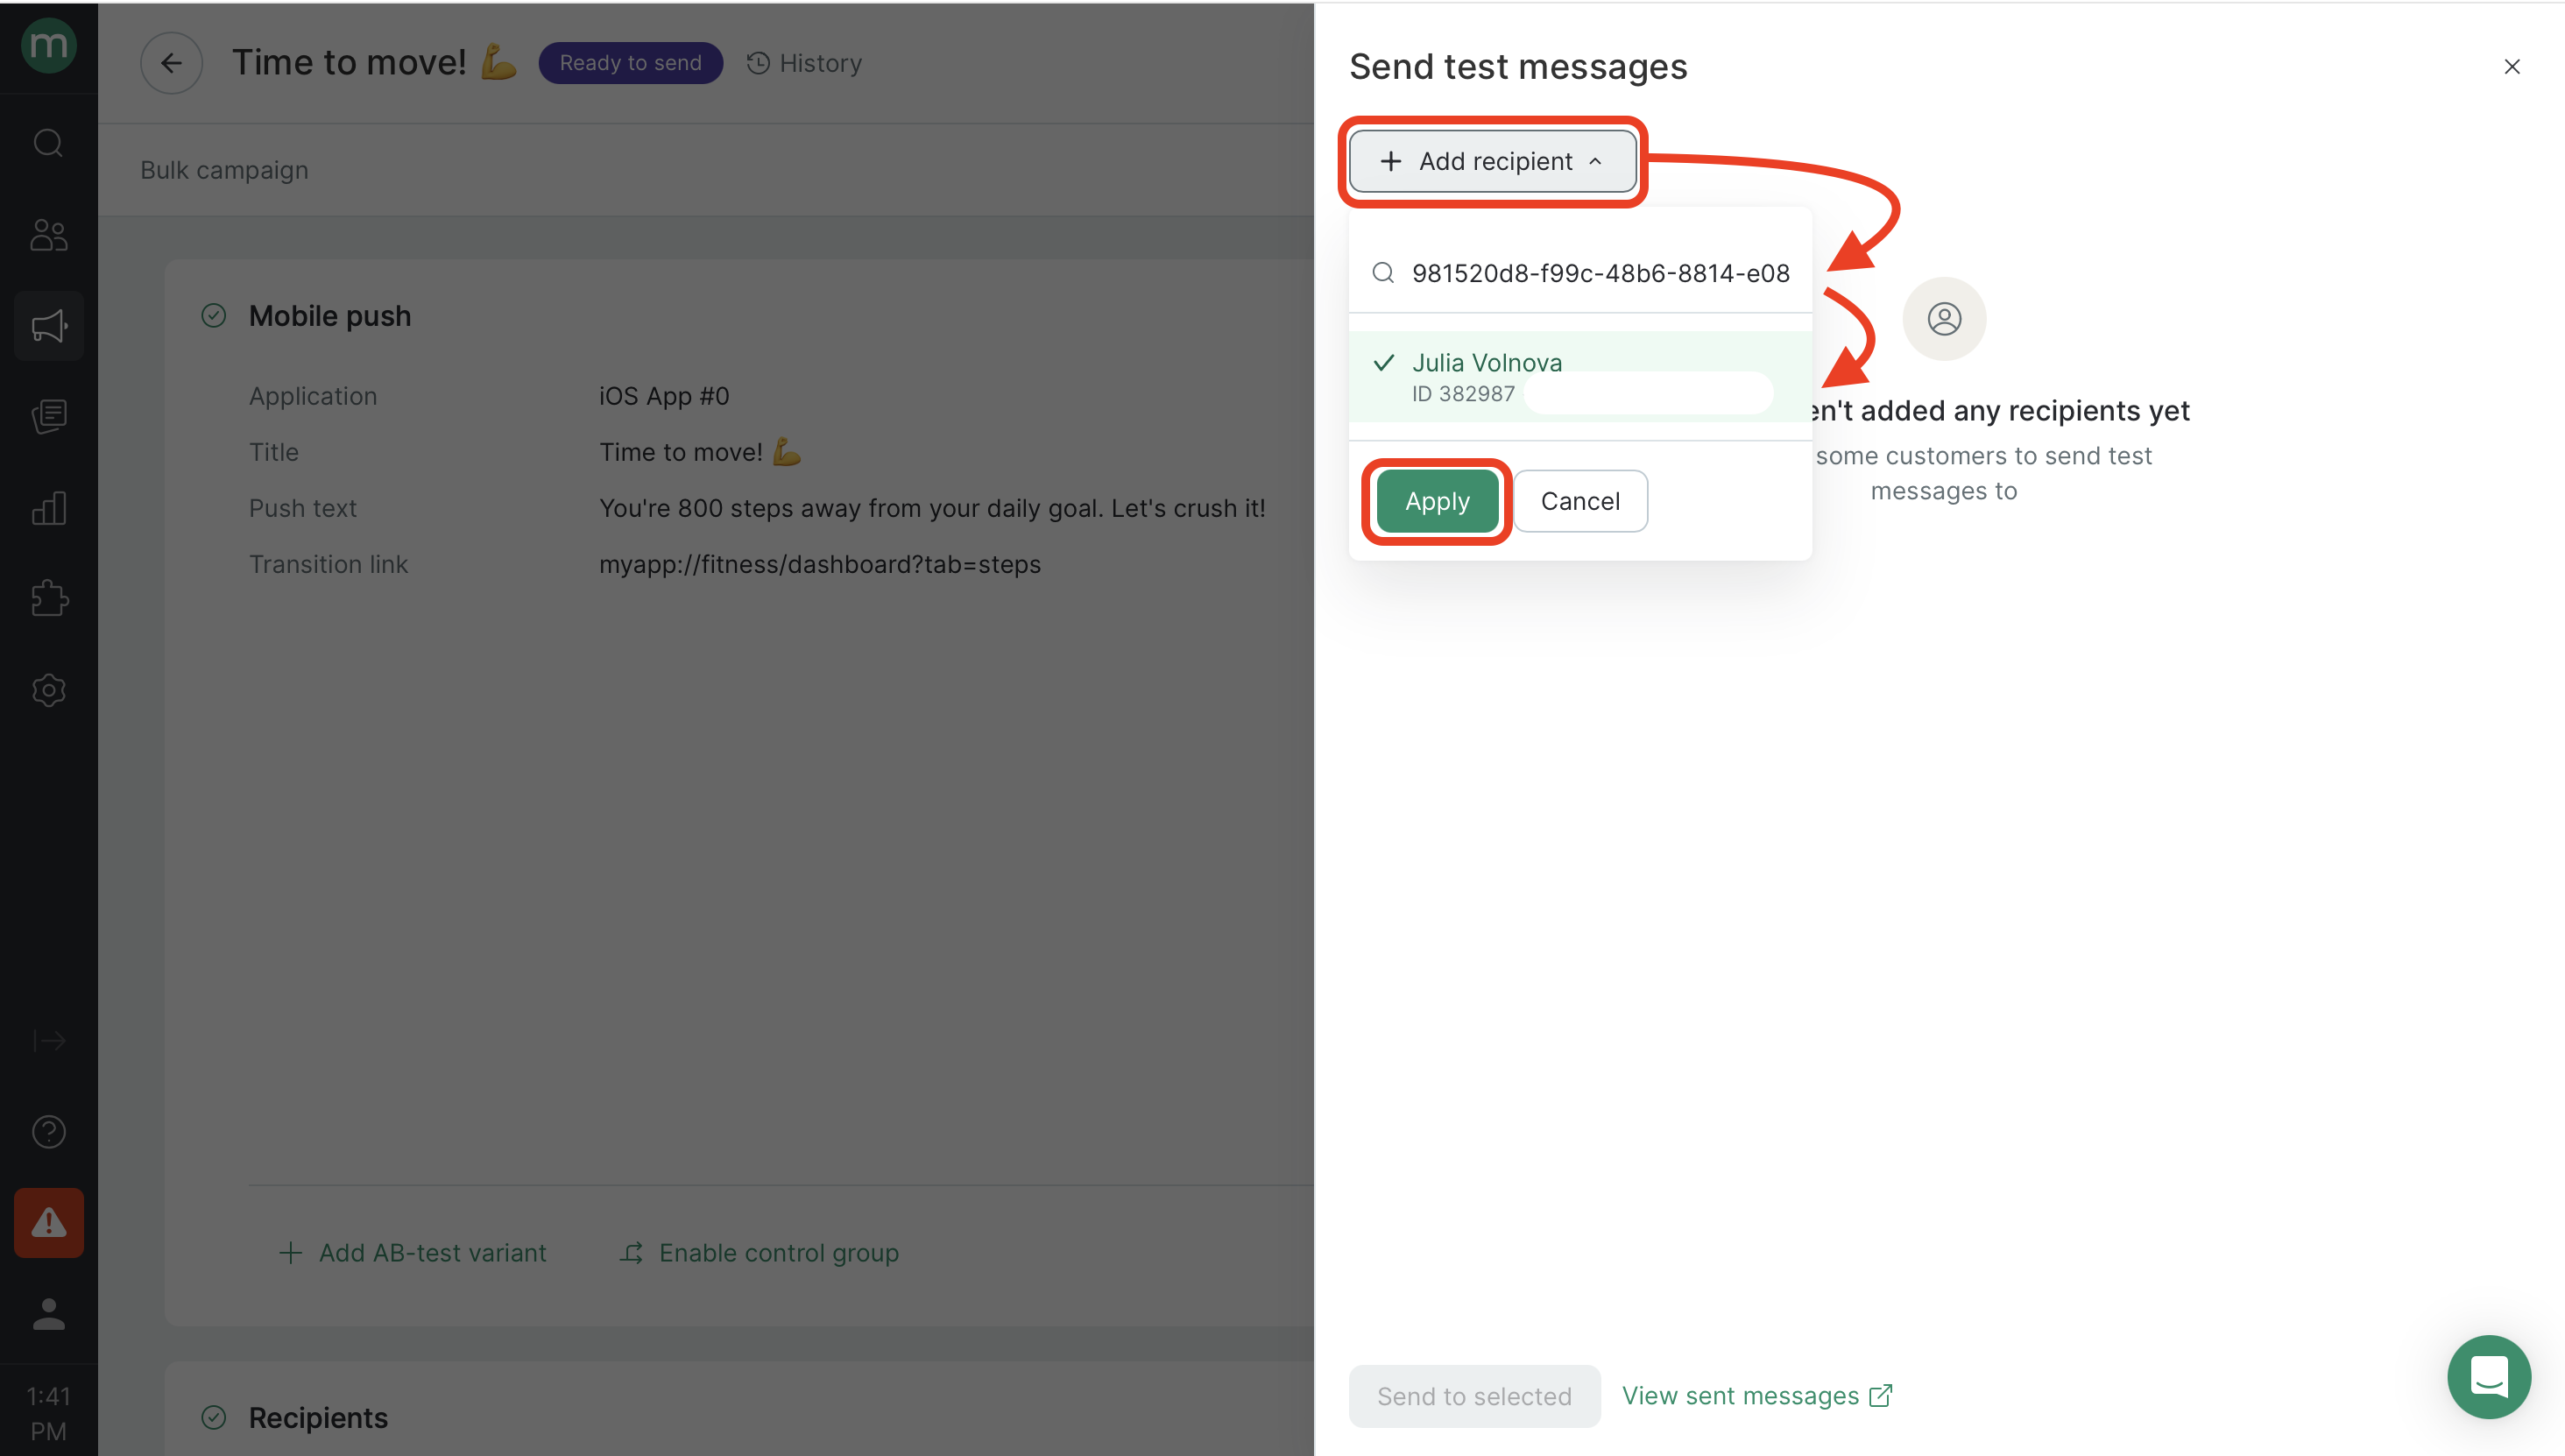
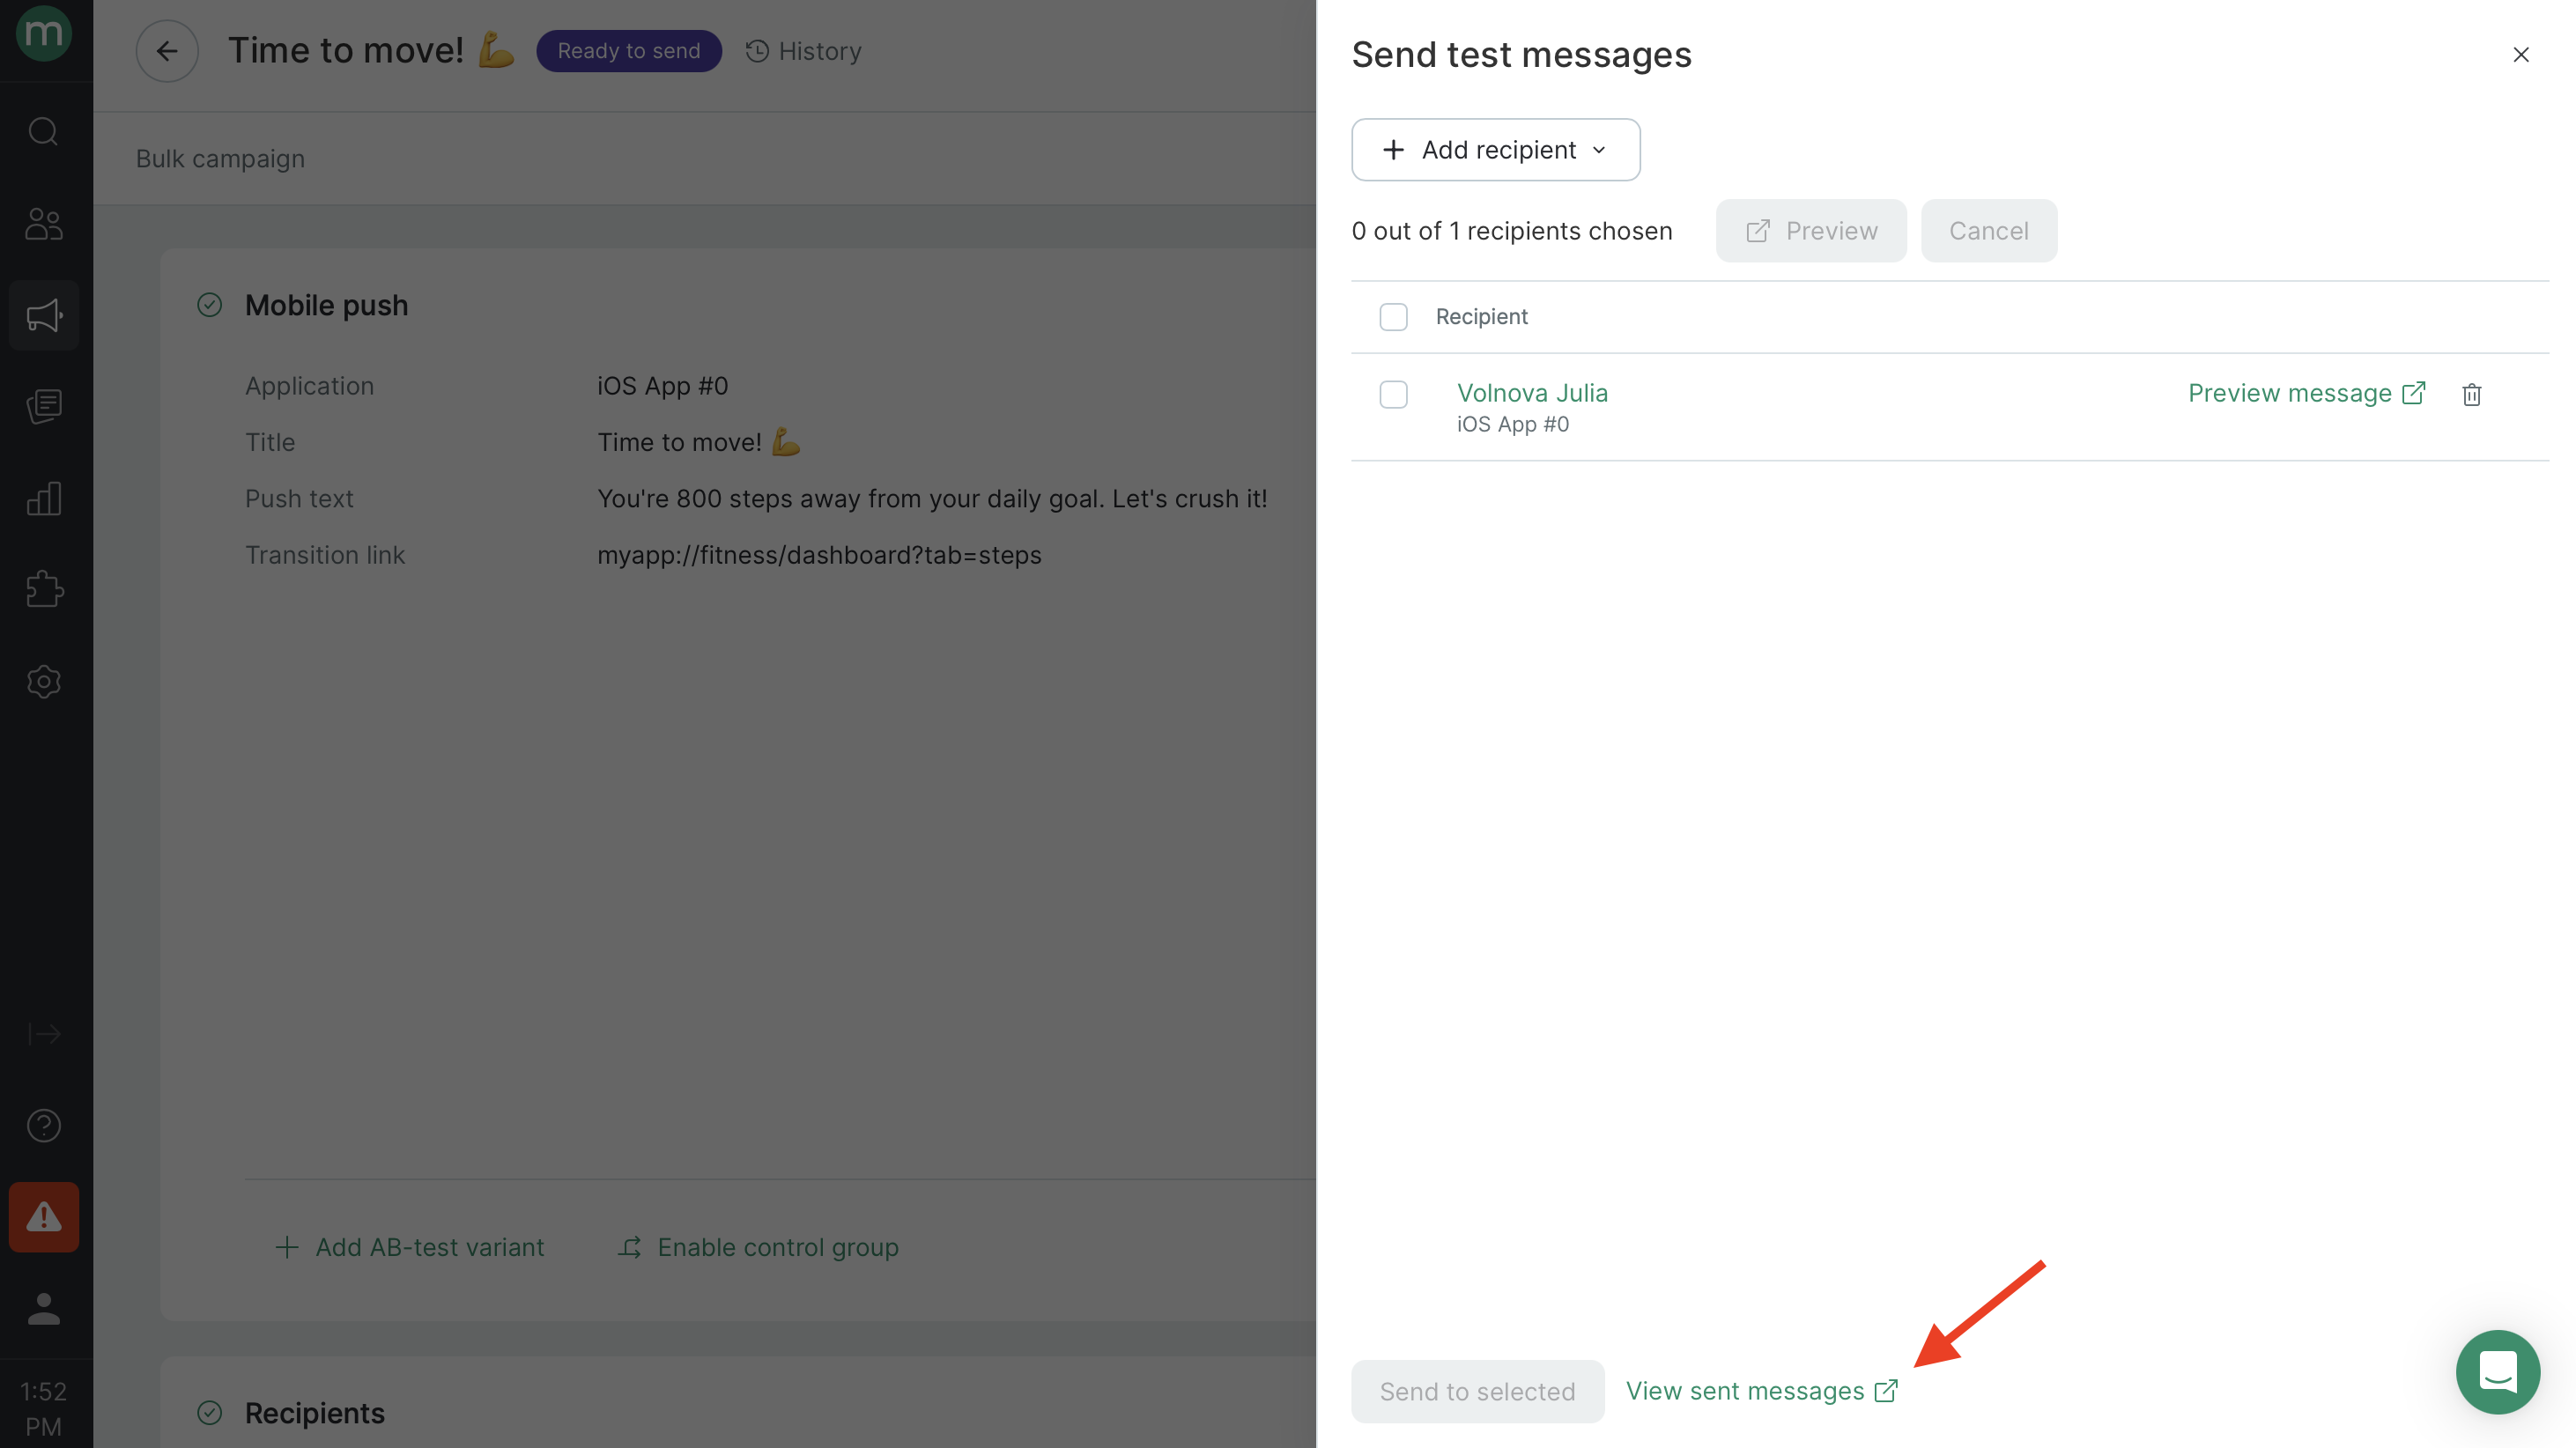
Click Test Sending and enter your
deviceUUIDin the search field.
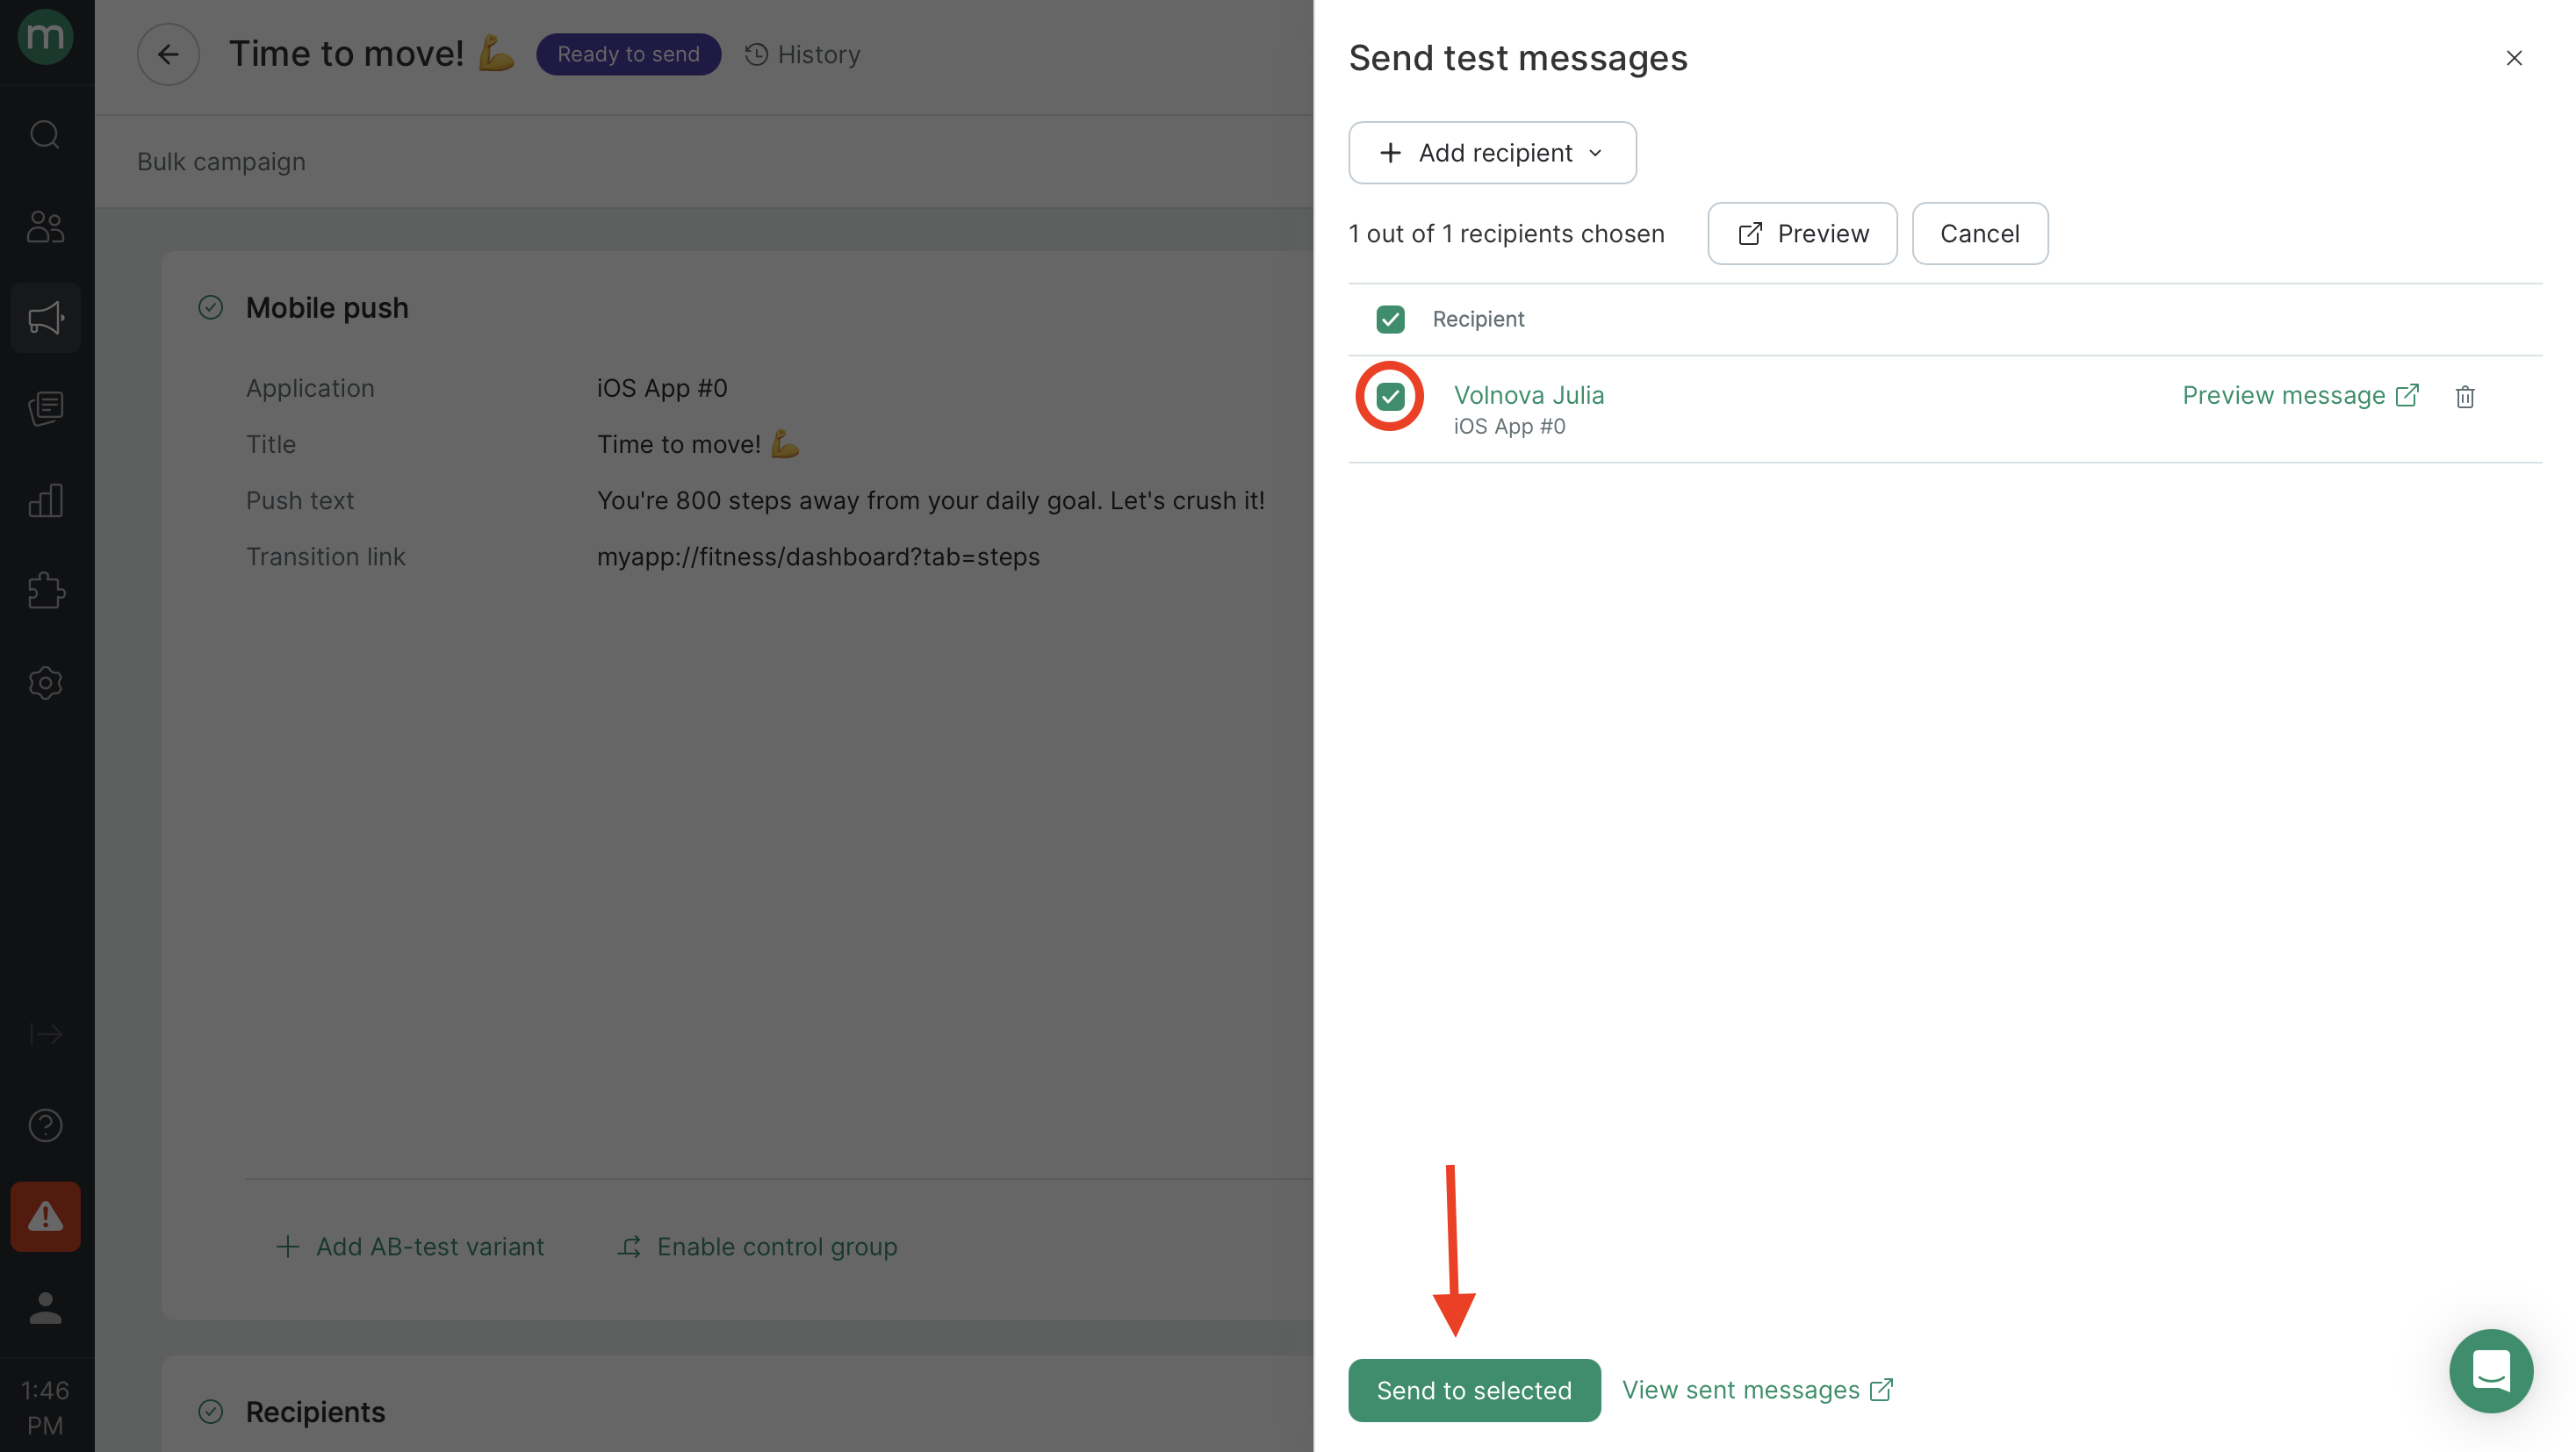
- Check the checkbox next to the recipient you want to send the message to and send the message.
- Open your test message list and confirm the last push shows a Sent status.
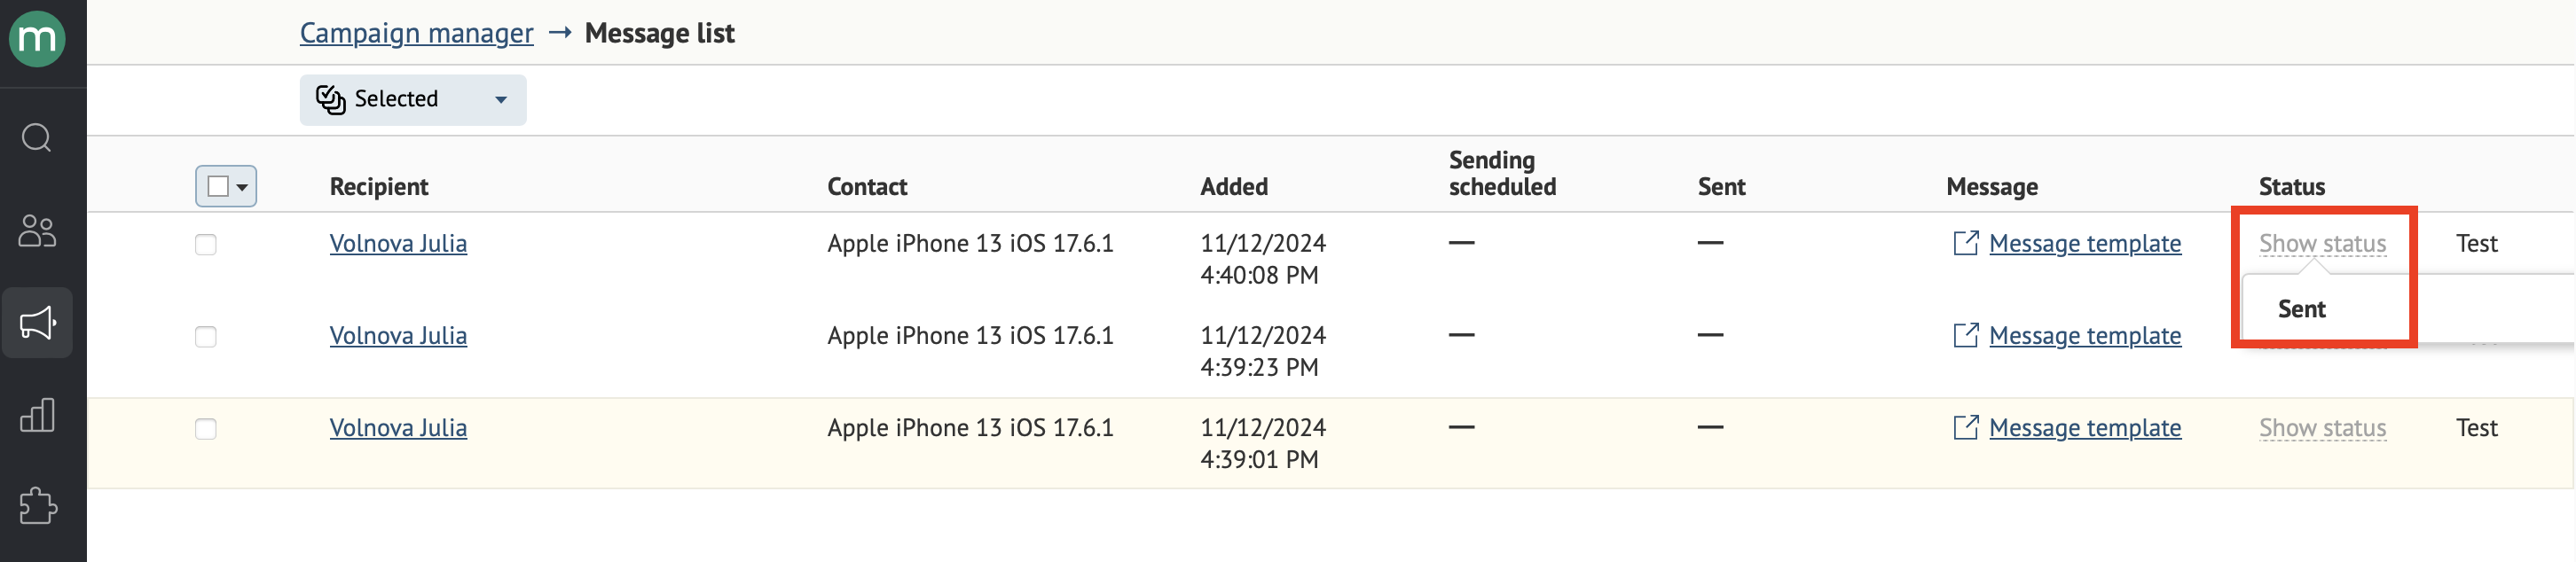
- Verify the result. The notification should appear on your phone.
Test scenarios
Basic push
No extra configuration needed — skip step 5.
How to verify: The notification appears on your device with the title and body text displaying correctly.
Push with an image
In step 5, add an image — either paste the image URL or upload it directly to the server.
How to verify: The notification appears with the title, body text and the image rendering correctly.
Push with action buttons
In step 5, fill in the button text and button URL fields.
How to verify: The notification appears on your device with the title, body text, and action buttons all rendering correctly.
Click tracking
No extra configuration needed — skip step 5.
After sending, tap the notification on your device.
How to verify: Open the list of test messages and confirm that the latest push notification has the status "Delivered to customer — Link clicked"
Updated 7 months ago