

1. DNS Setup
Setting up DNS Signatures to verify Maestra as your email sender
Prerequisites
- Access to your domain DNS settings.
- Access to Maestra platform.
- MXToolbox - to ensure proper setup of DNS records: DKIM, DMARC, and CNAME.
Email Authentication Setup: DKIM & DMARC
DKIM and DMARC ensure your emails sent from Maestra are trusted, not flagged as spam, and fully authenticated.
DKIM Setup
If you haven't added a sender yet, start with How to Add a Sender's Email Address first.
Step 1: Generate DKIM for your sender in Maestra and copy the generated TXT record
TXT record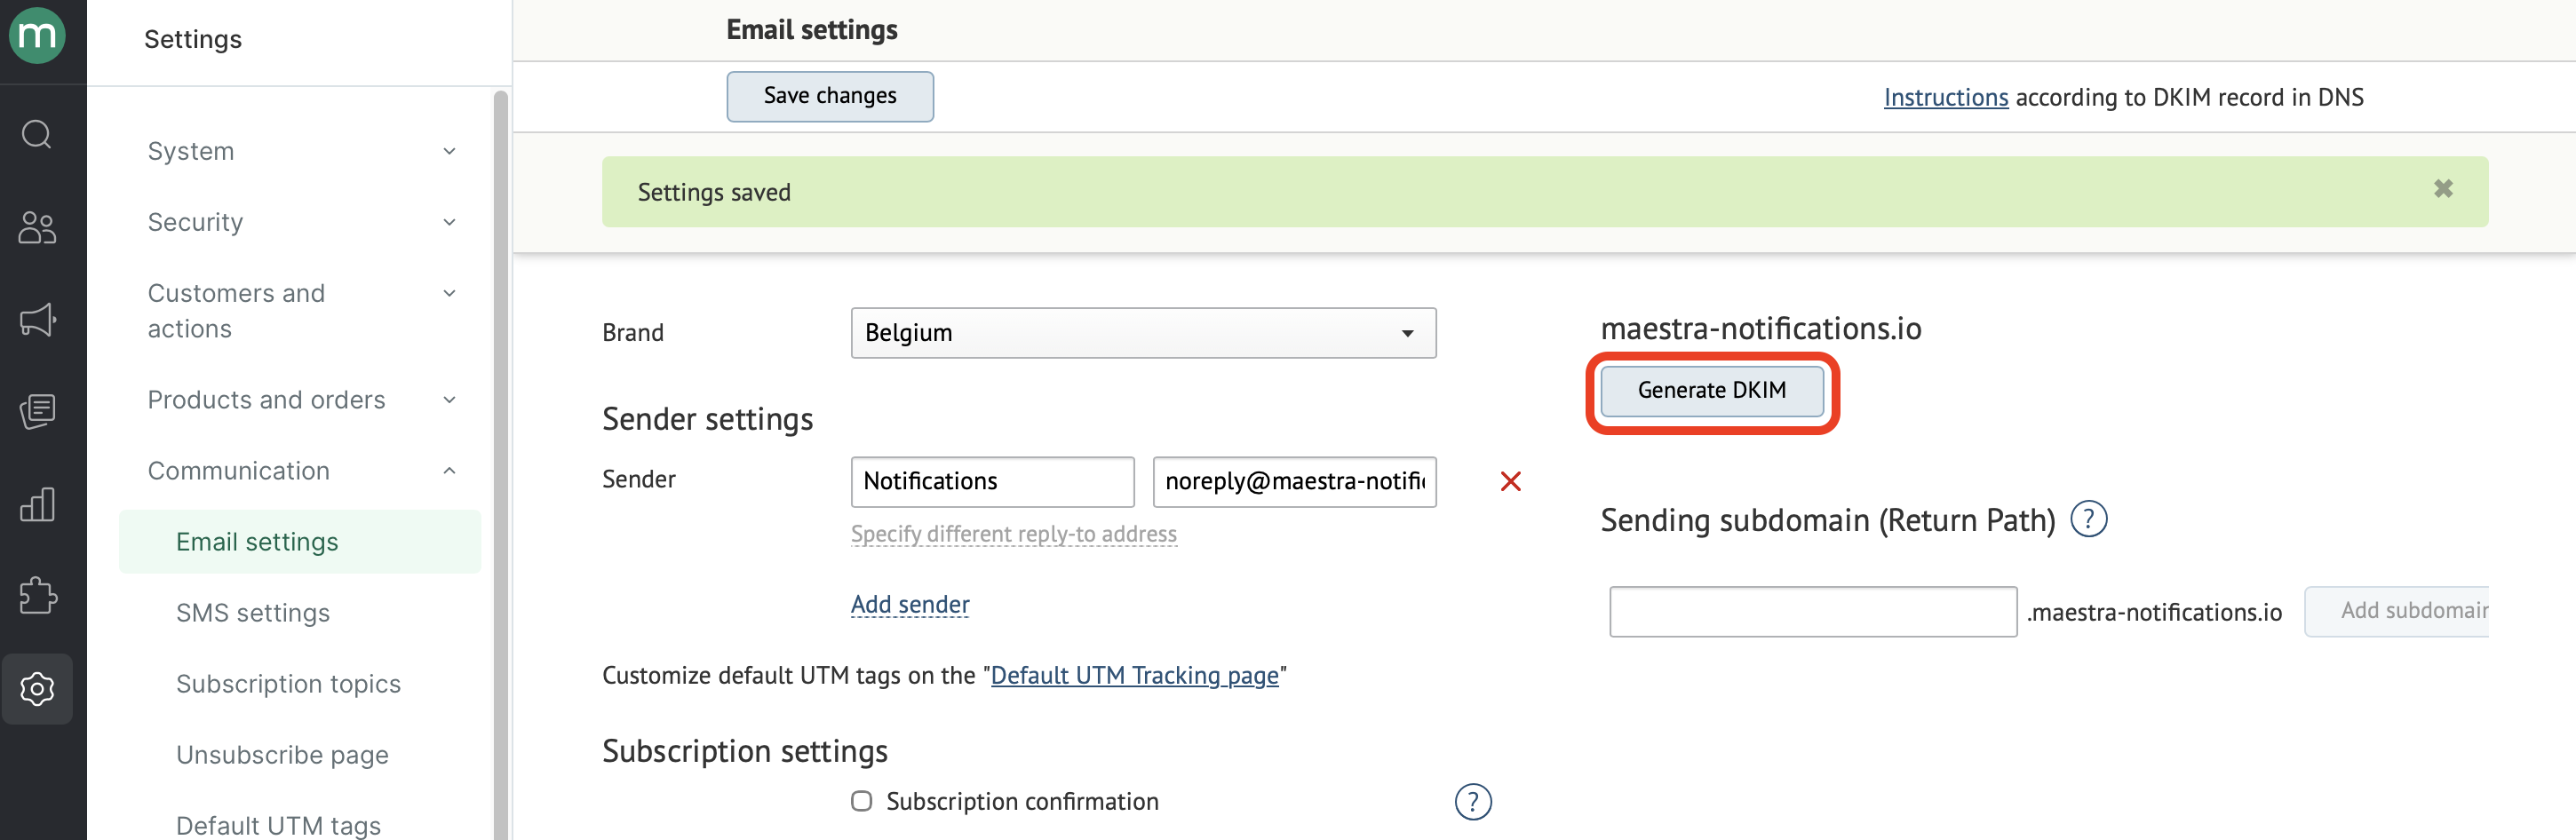
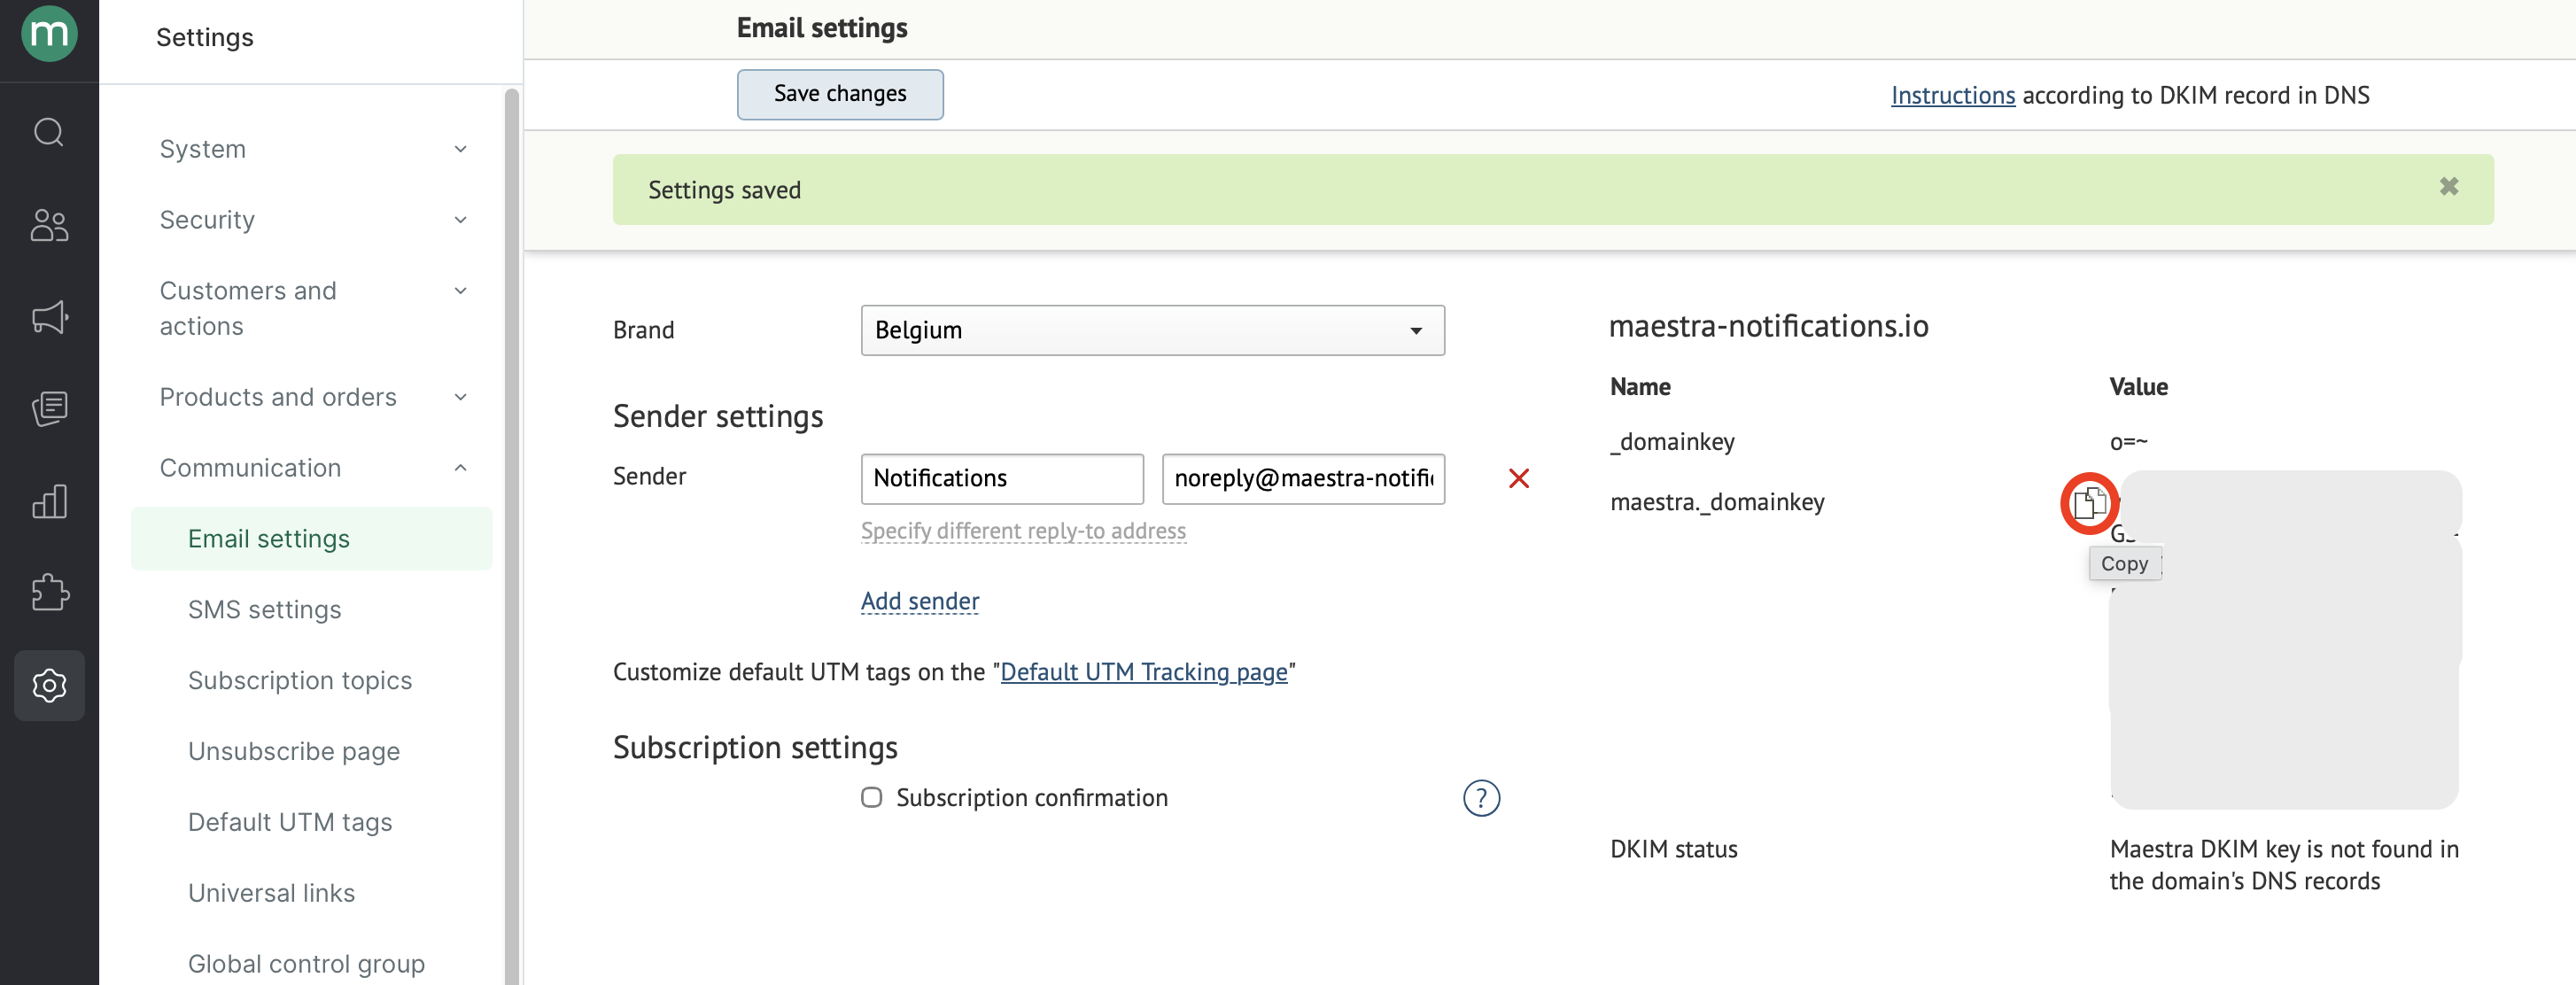
Step 2: Add DNS Records
Add the following TXT records to your DNS:
| Name | Type | Value |
|---|---|---|
_domainkey | TXT | o=~; |
maestra._domainkey | TXT | Paste the DKIM key from previous step here |
DMARC Setup
Example Record
| Name | Type | Value |
|---|---|---|
_dmarc.company.com | TXT | v=DMARC1; p=none |
For more detailed information on DMARC , check out Google’s Workspace Admin Help guide.
Troubleshooting
Still seeing “No DKIM record found” OR is DMARC info missing?
This may mean your DNS has not propagated yet or the record was added incorrectly.
- Double-check for typos in record names or values.
- Wait up to 24 hours for changes to propagate.
- Use MXToolbox to see if external servers detect your records.
- Contact your hosting provider’s support if records don’t appear.
Setting Up a Custom Return-Path Domain
A custom return-path domain is not the actual sender of your campaigns. If there are no senders set up in the project yet, please refer to the How to Add Sender's email address first.
Setting up a custom return-path lets you:
- See your own bounce data — instead of bounces going to Maestra's default domain, they come to yours, so you can see exactly which emails failed and why
- Improve authentication — mailbox providers (Gmail, Yahoo, etc.) check that the domain in your "From" address matches the domain handling bounces. A custom return-path makes these match, which helps emails land in inbox instead of spam
- Build reputation on your domain — without it, your sending reputation is tied to Maestra's shared domain along with other brands. With it, your reputation is yours alone.
Follow the steps below to set up your Custom Return-Path Domain:
Add the sending subdomain (return-path)
-
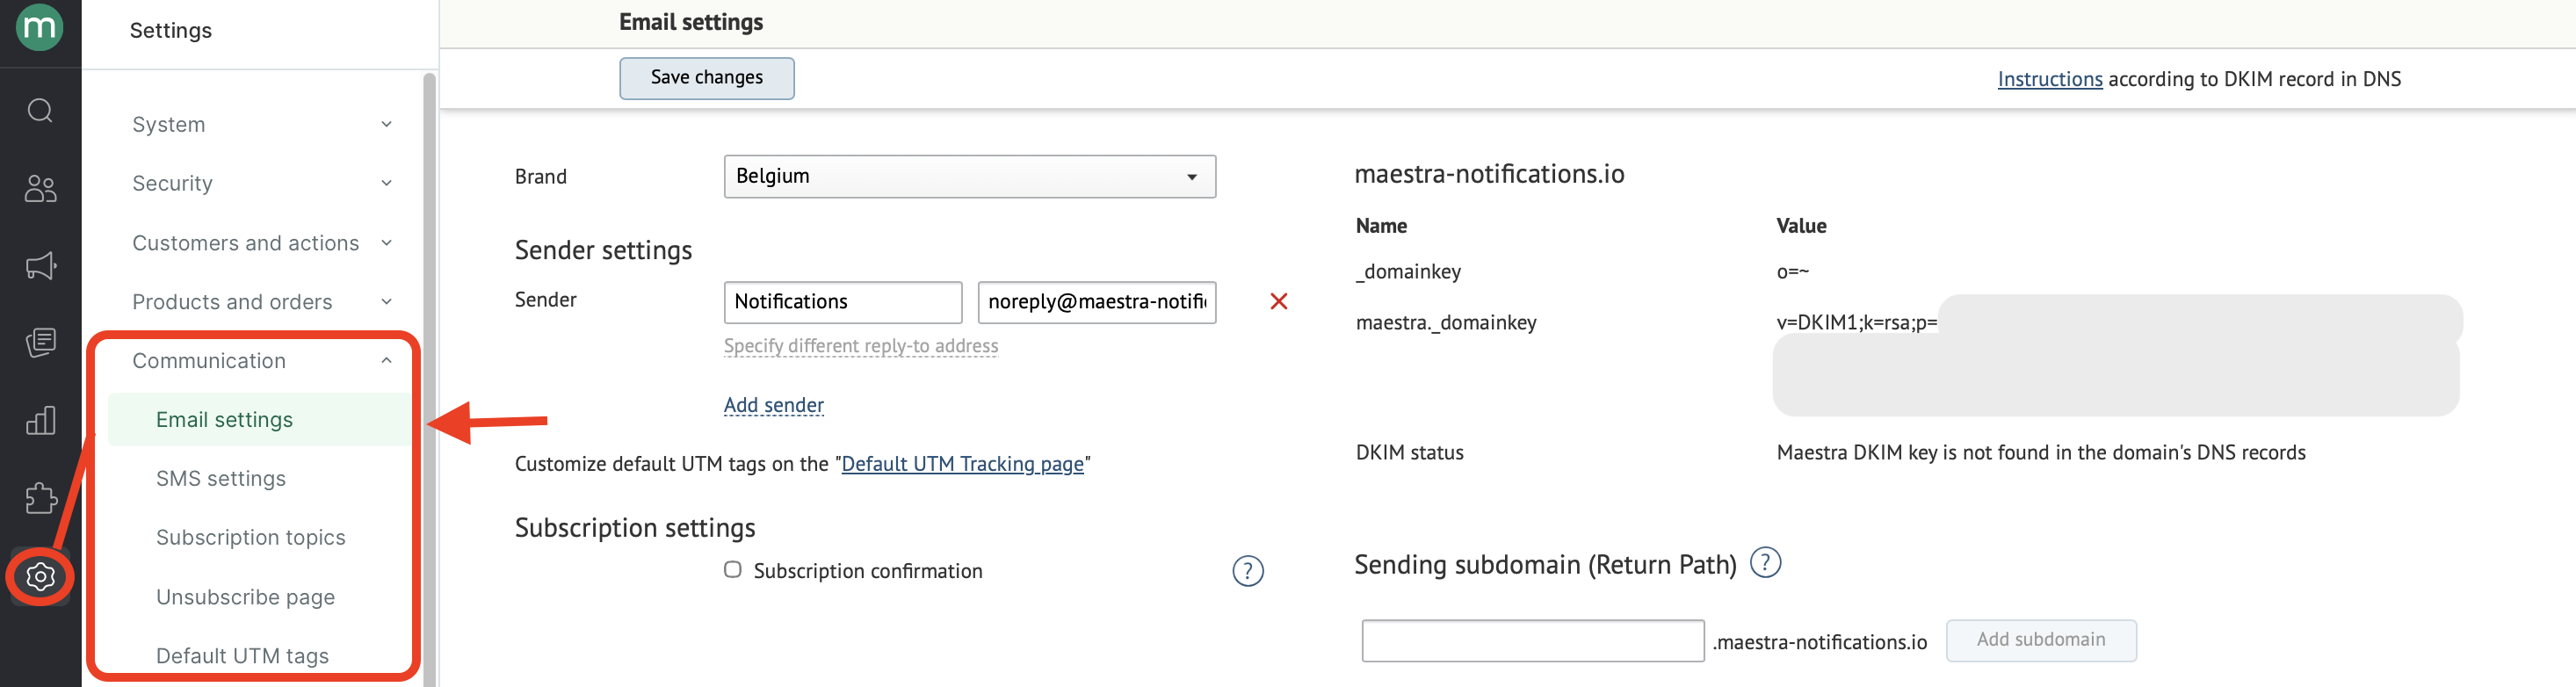
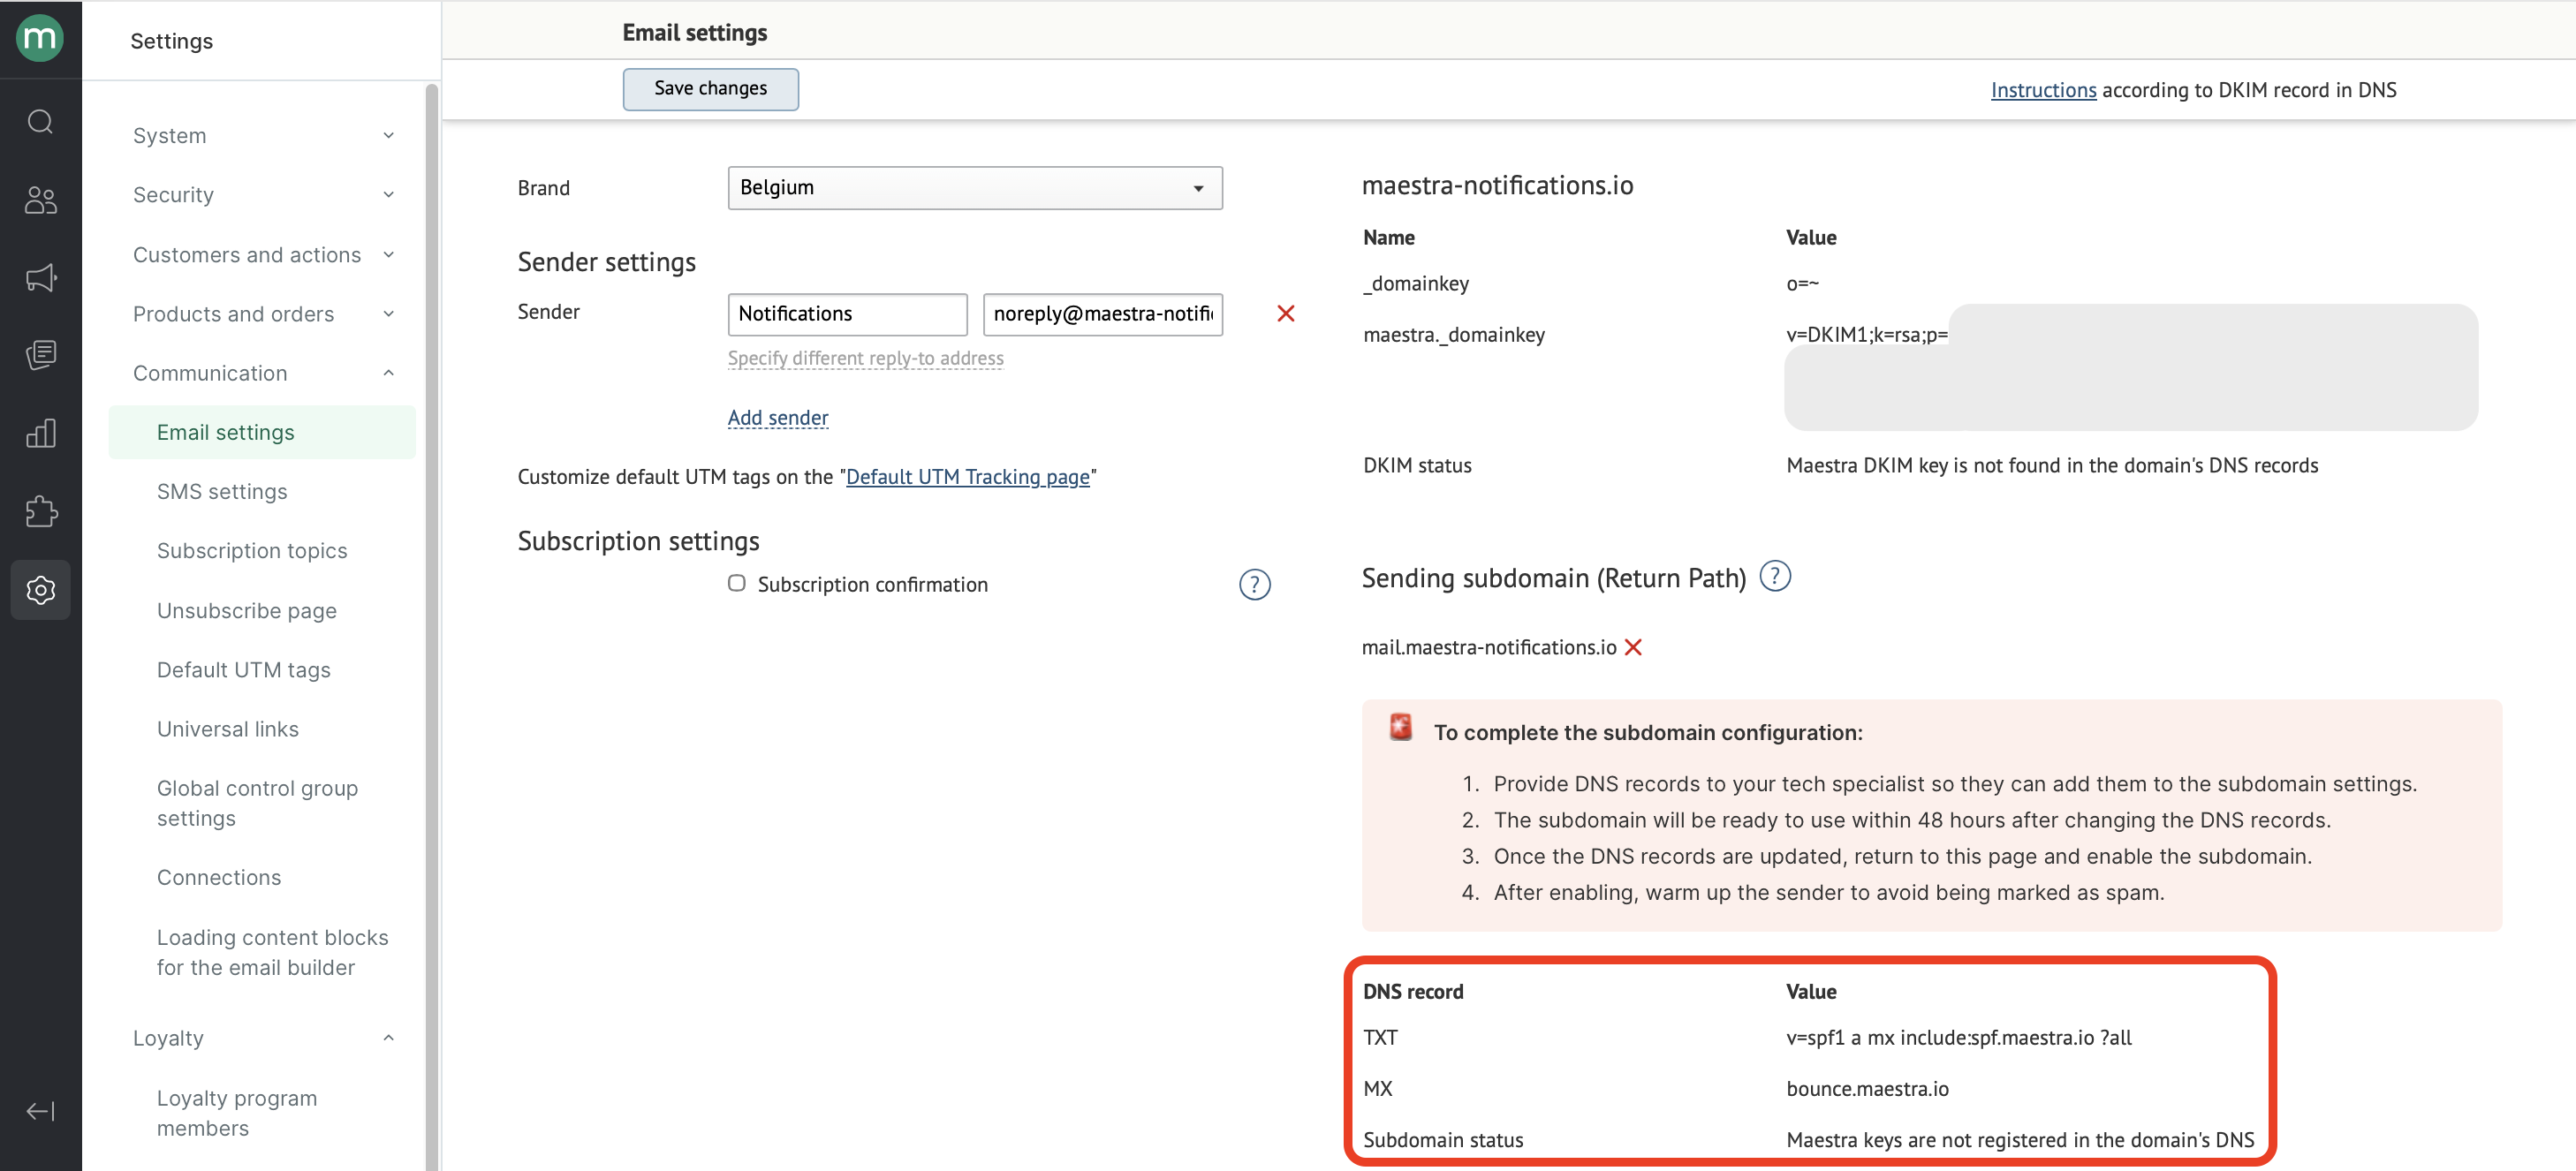
Go to Settings → Communication → Email Settings :
-
Select the brand and the appropriate domain in the list.
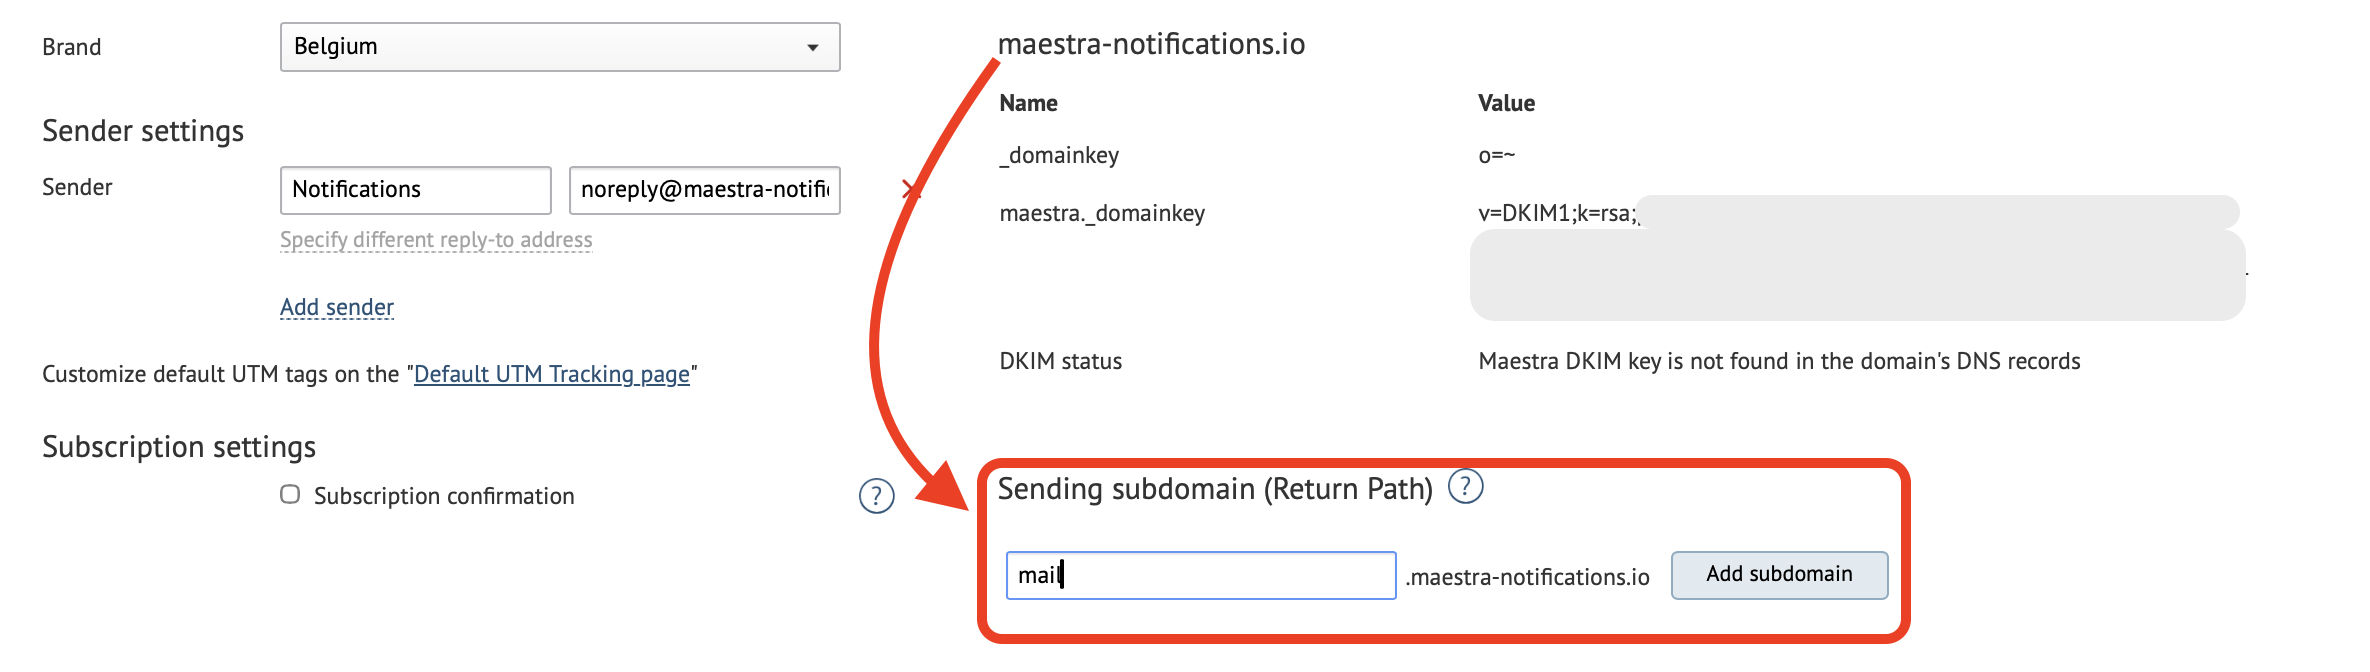
The field for configuring the sending subdomain is located directly below the domain’s DKIM record. -
Enter the subdomain name.
-
Click “Add Subdomain”.
The system will generate MX and SPF records, which you’ll need to add to your DNS settings.
Note
Only one sending subdomain can be added per sending domain.
Set Up DNS Records for the subdomain
Copy the generated records and share them with your IT team, or add them manually in your domain’s DNS settings.
When adding the generated records, enter the subdomain name you specified in Maestra in the “Name” field.
Examples of record names:
mail.maestra-notifications.io → mail
info.mail.maestra-notifications.io → info.mail
Note
For each subdomain, you can have:
- One SPF record
- Multiple MX records
If multiple MX records are configured, make sure the MX record for Maestra has the highest priority (the lowest numerical value) among all MX records.
Example DNS records for the subdomain mail.maestra-notifications.io:
| Name | Type | Priority | Value |
|---|---|---|---|
| MX | 1 | bounce.maestra.io | |
| TXT | — | v=spf1 a mx include:spf.maestra.io ?all |
After the DNS records are added, the sending subdomain will be fully configured within 48 hours.
Confirm Subdomain Setup
Once the subdomain is ready, a notification email will be sent to the user who added it.
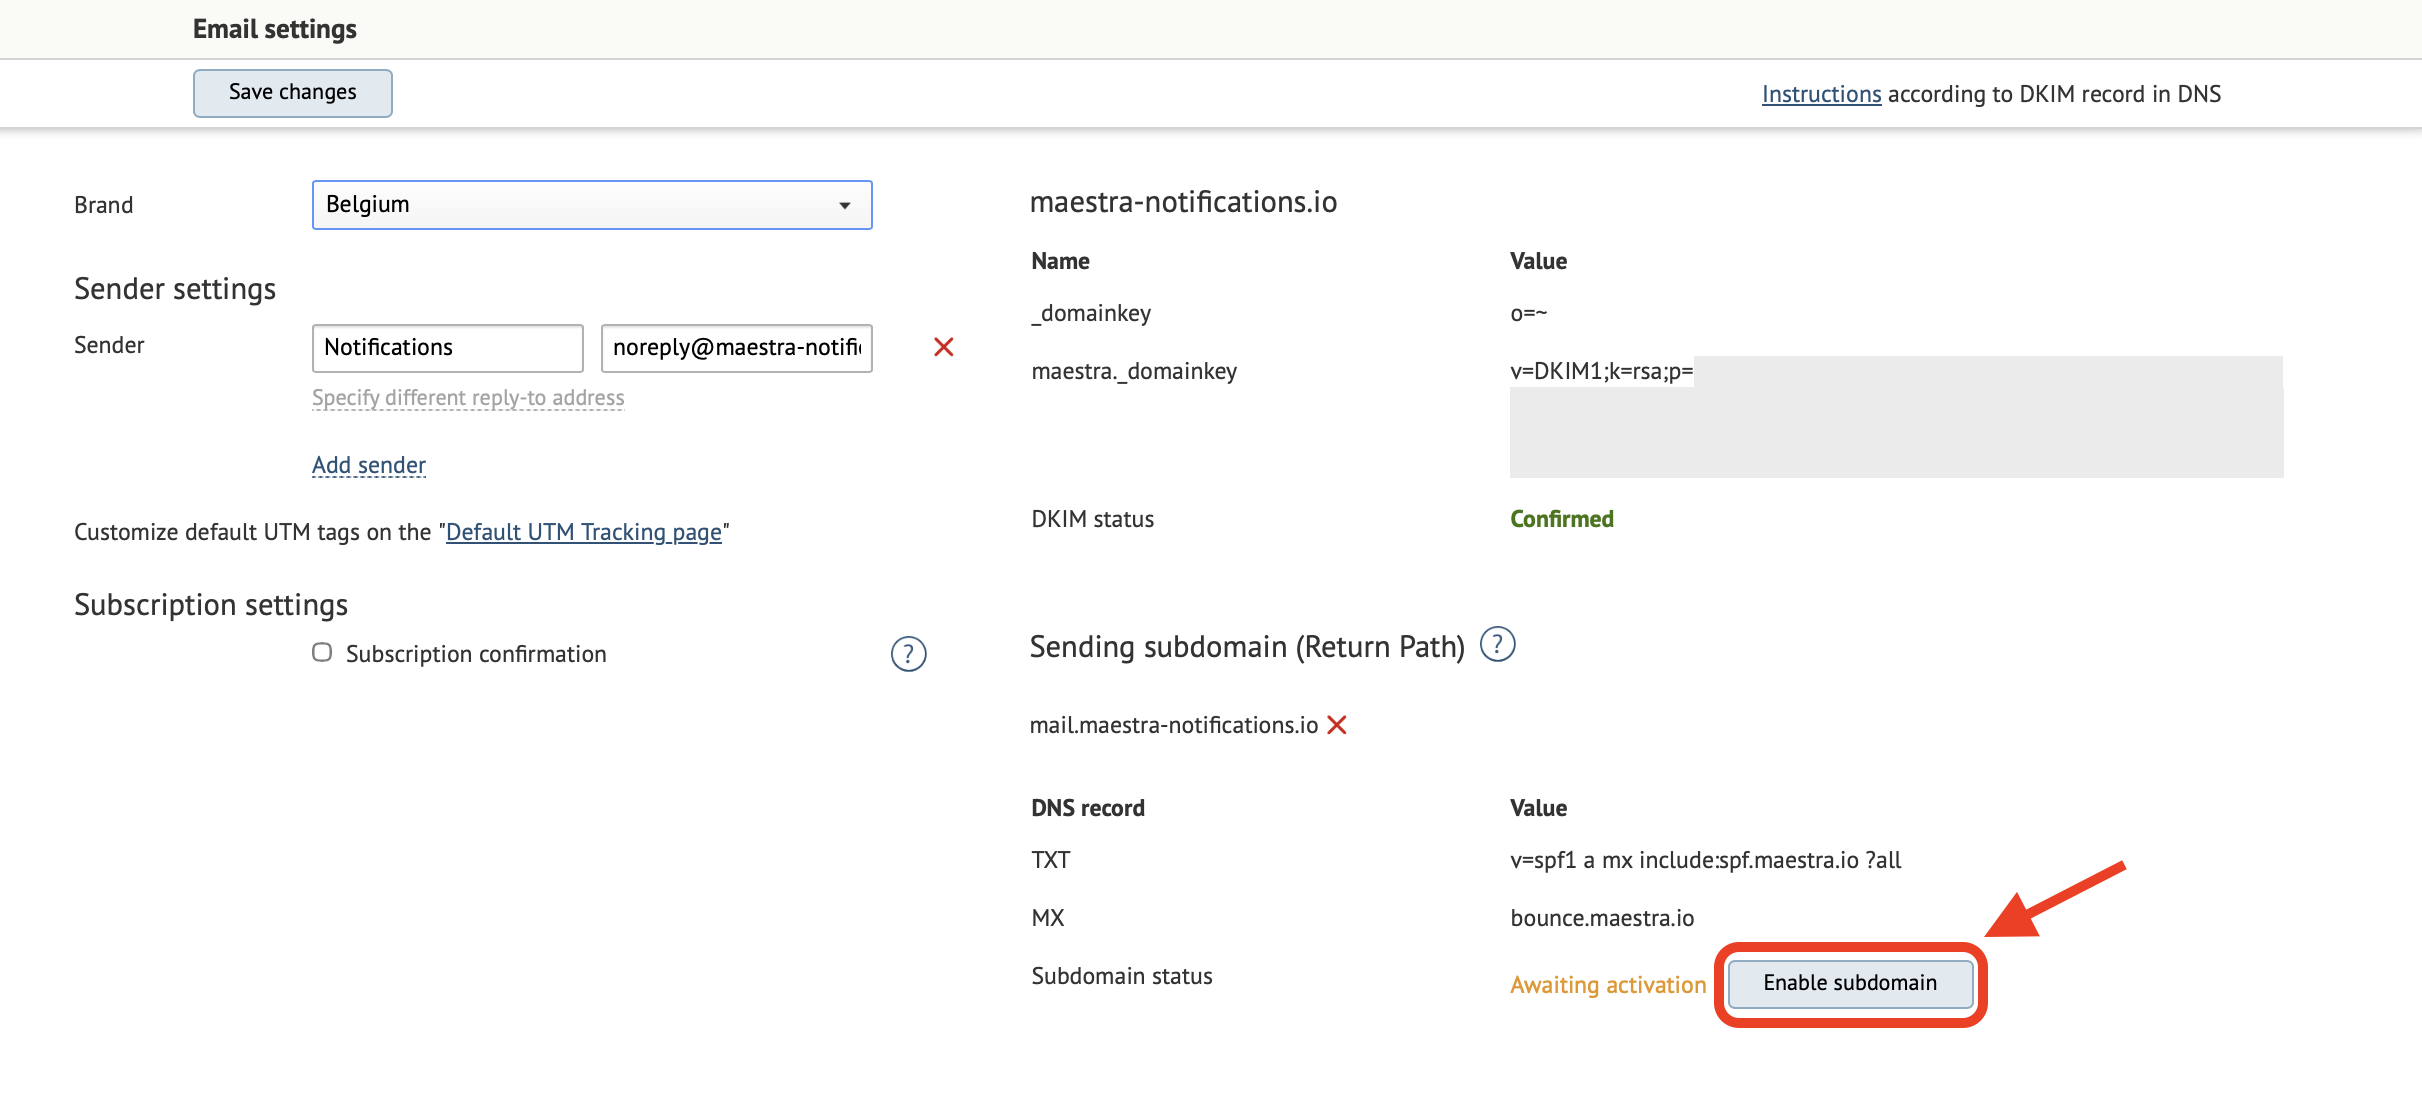
- Go to Settings → Communication → Email Settings.
- Click the button to confirm the domain is ready.
Sending after setup
When you set up a custom return-path, your configuration changes. Mailbox providers may need time to build trust with the updated configuration.
If this is your first time setting up DKIM, DMARC, and a custom return-path, you'll need to warm up your domain before sending at full volume. Reach out to your Maestra Forward Deployed Marketer — they'll help you set the right sending volumes, review your email content, and build a segment of engaged recipients to start with.
If DKIM and DMARC were already in place and your domain is fully warmed up, and you're only adding a custom return-path — no full warmup is needed. Just increase your sending speed gradually over the first 3–4 campaigns. A simple guideline: limit your hourly volume to your total list size ÷ 4, then return to normal.
For example, if your list is 40,000 contacts, send no more than 10,000 emails per hour for the first 3–4 campaigns. After that, you can return to normal sending speed.
What to do if return-path become unavailable
Maestra checks the DNS records for the sending subdomain every 10 minutes.
If the Return-path is no longer detected:
- Email sending will not be paused.
- All emails will start being sent using Maestra technical subdomain as a return-path.
- If a recipient unsubscribes from an email sent using custom return path, the unsubscribe event will not be recorded in Maestra.
- An error will appear in all affected campaigns in the project.
- An issue will be automatically created in the project.
Click the link in the issue to view more details.
To resume sending please restore the DNS records.
How to Verify Your Return-Path
To verify that the subdomain is working properly, send a test email to any mailbox.
Using the email details, you can check which domain was used for sending.
Open the original message (Show original button):
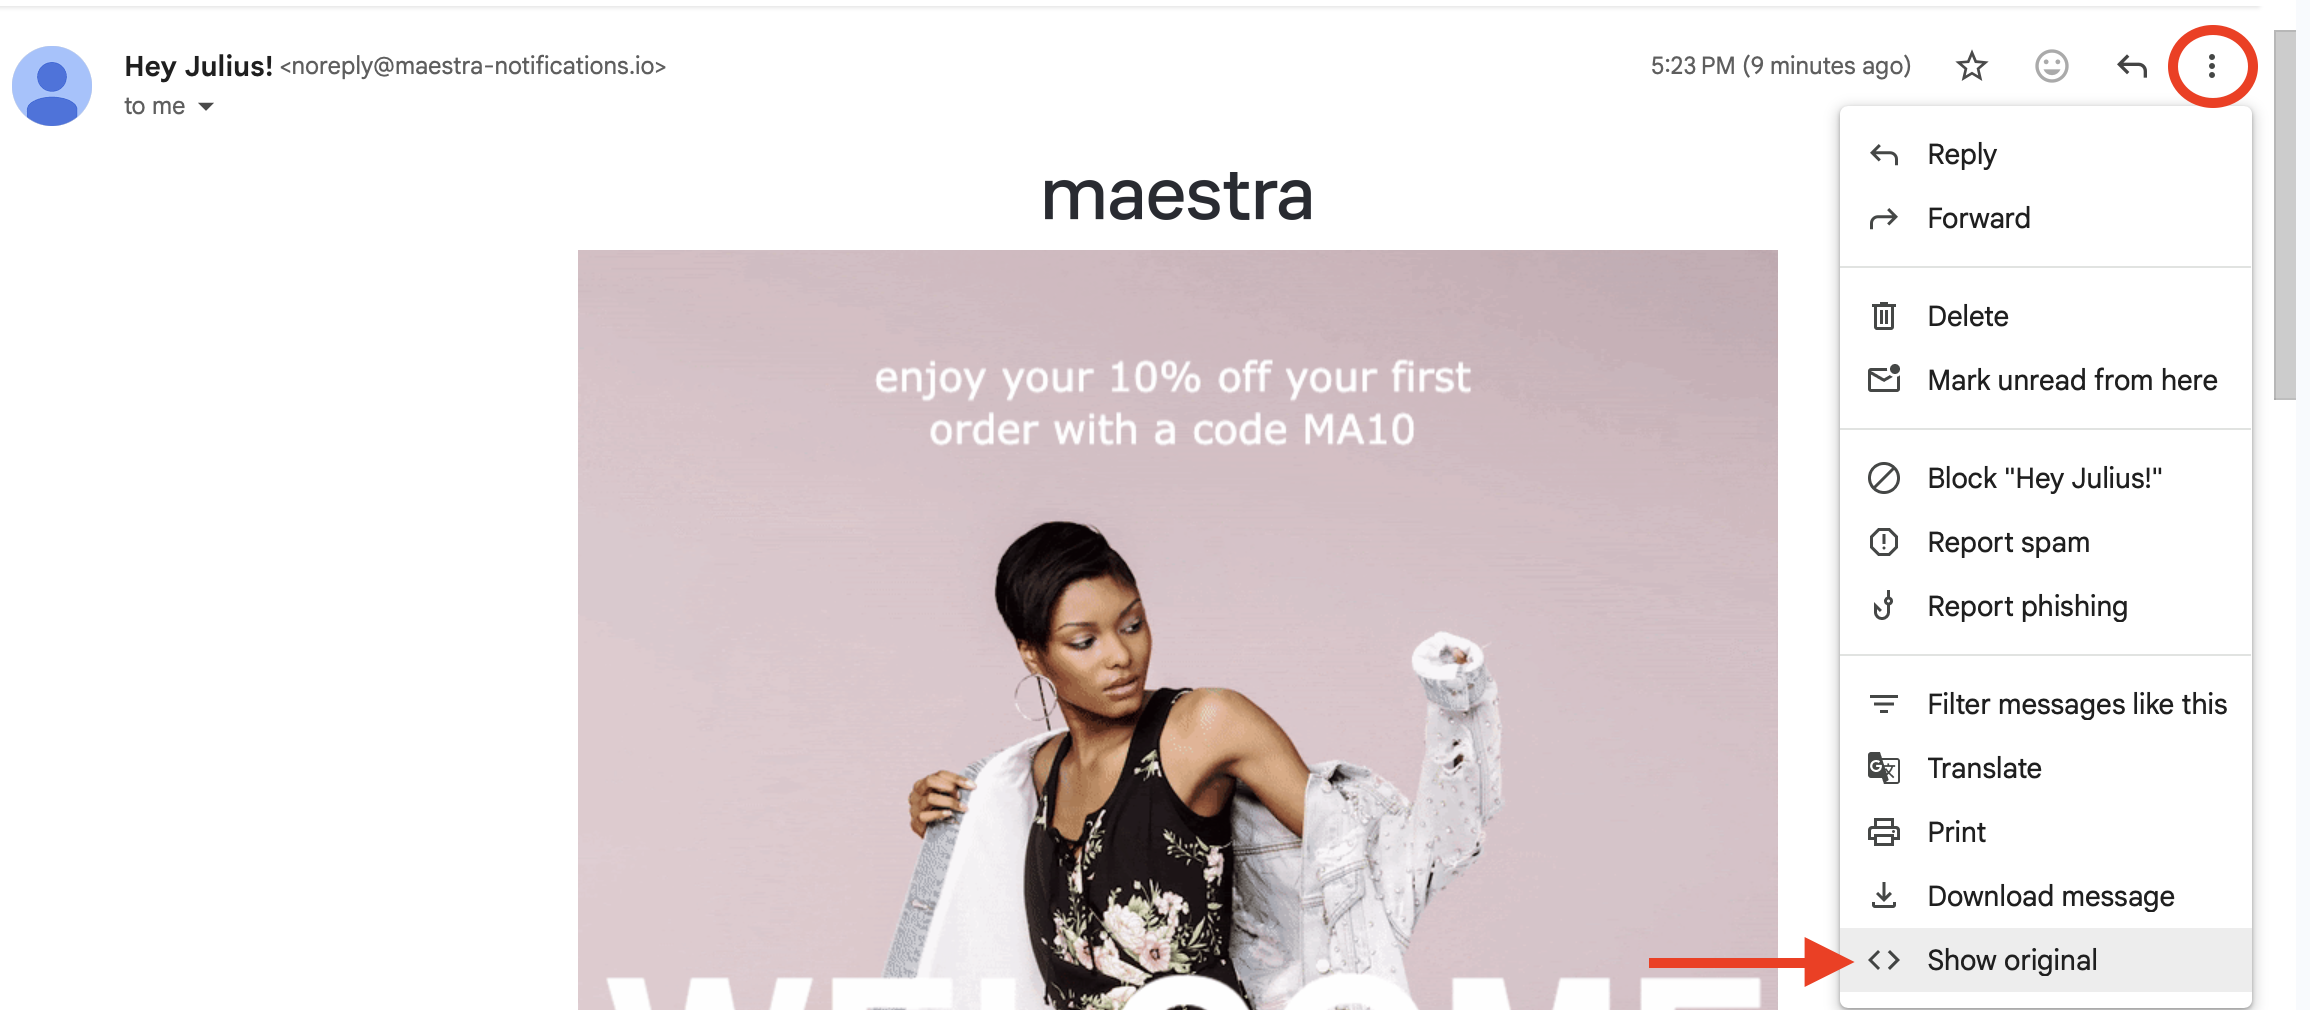
The subdomain will appear in the Return-Path header.

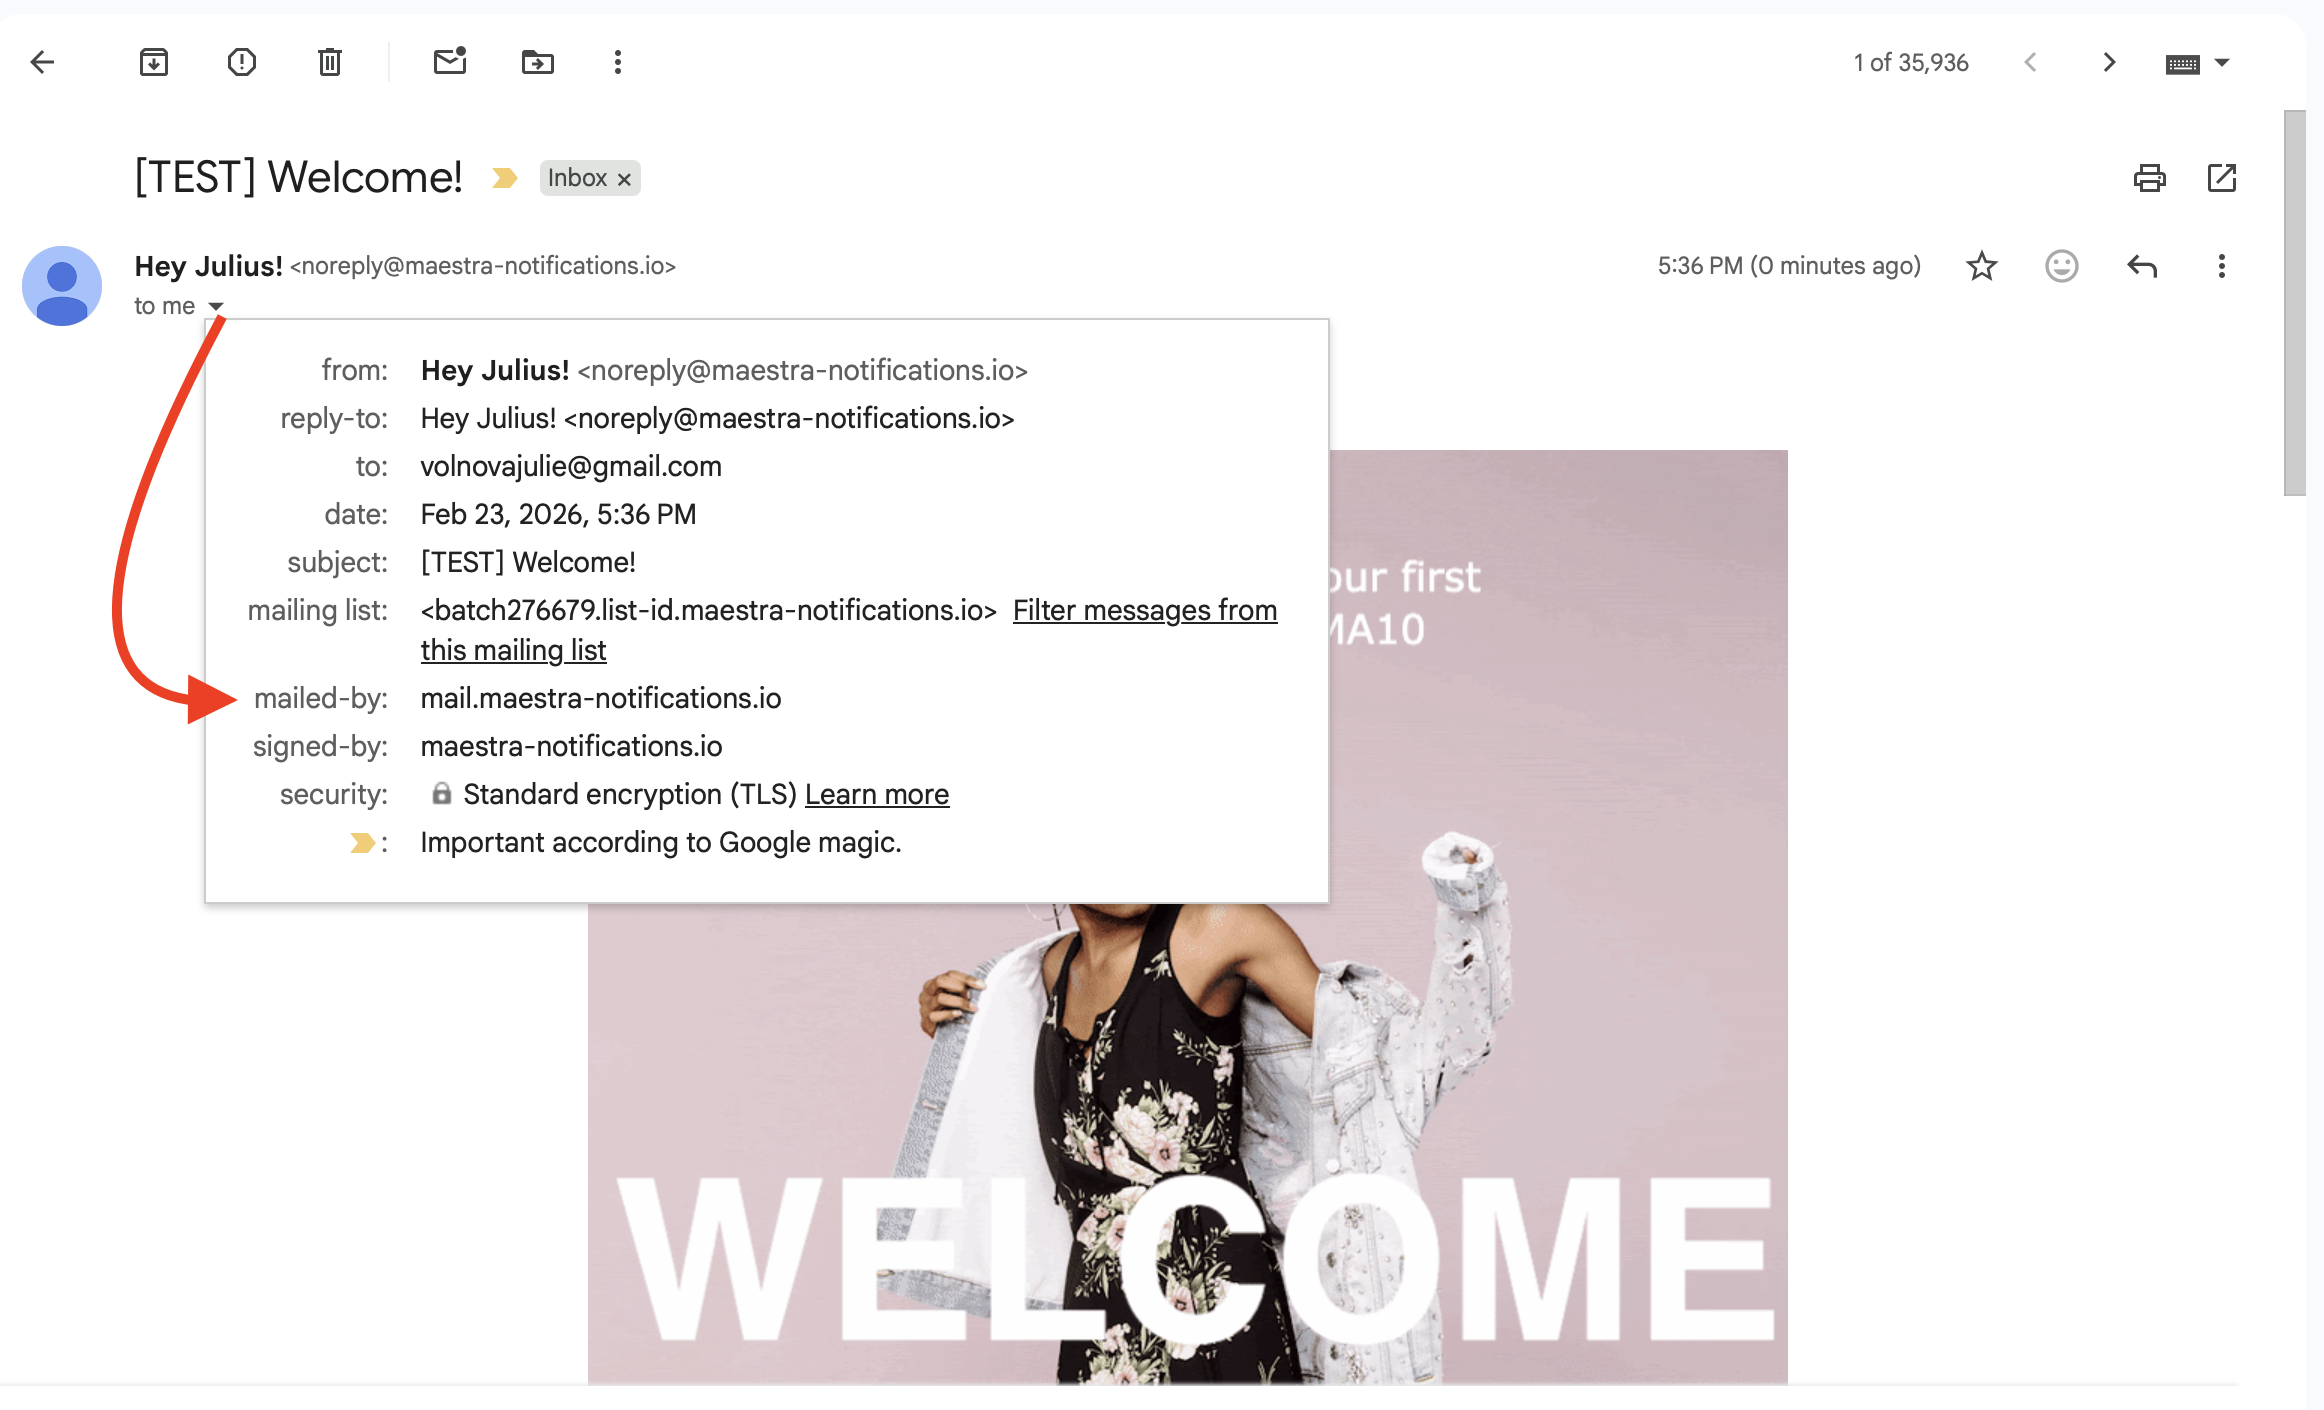
In Gmail, you can check the sending details without opening the original message. The dedicated subdomain will appear in the ‘Mailed by’ field.
Need Help?
If you’re stuck, contact your Maestra marketer for assistance.
Updated 2 months ago